
CONSIDERED DESIGN. CLEAR GUIDANCE.
Your store.
Your next move.
From the first install to the finishing touches.
Start with Motiv
A practical guide to building your activewear store with Motiv, WordPress and WooCommerce.
Install your theme
Understand the ZIP files and activate the essentials.
Get started ↗02 / BUILDImport the demo
Choose a homepage and bring in the starter collection.
Import your demo ↗03 / MAKE IT YOURSCustomize your store
Replace branding, edit pages and style your website.
Open the guide ↗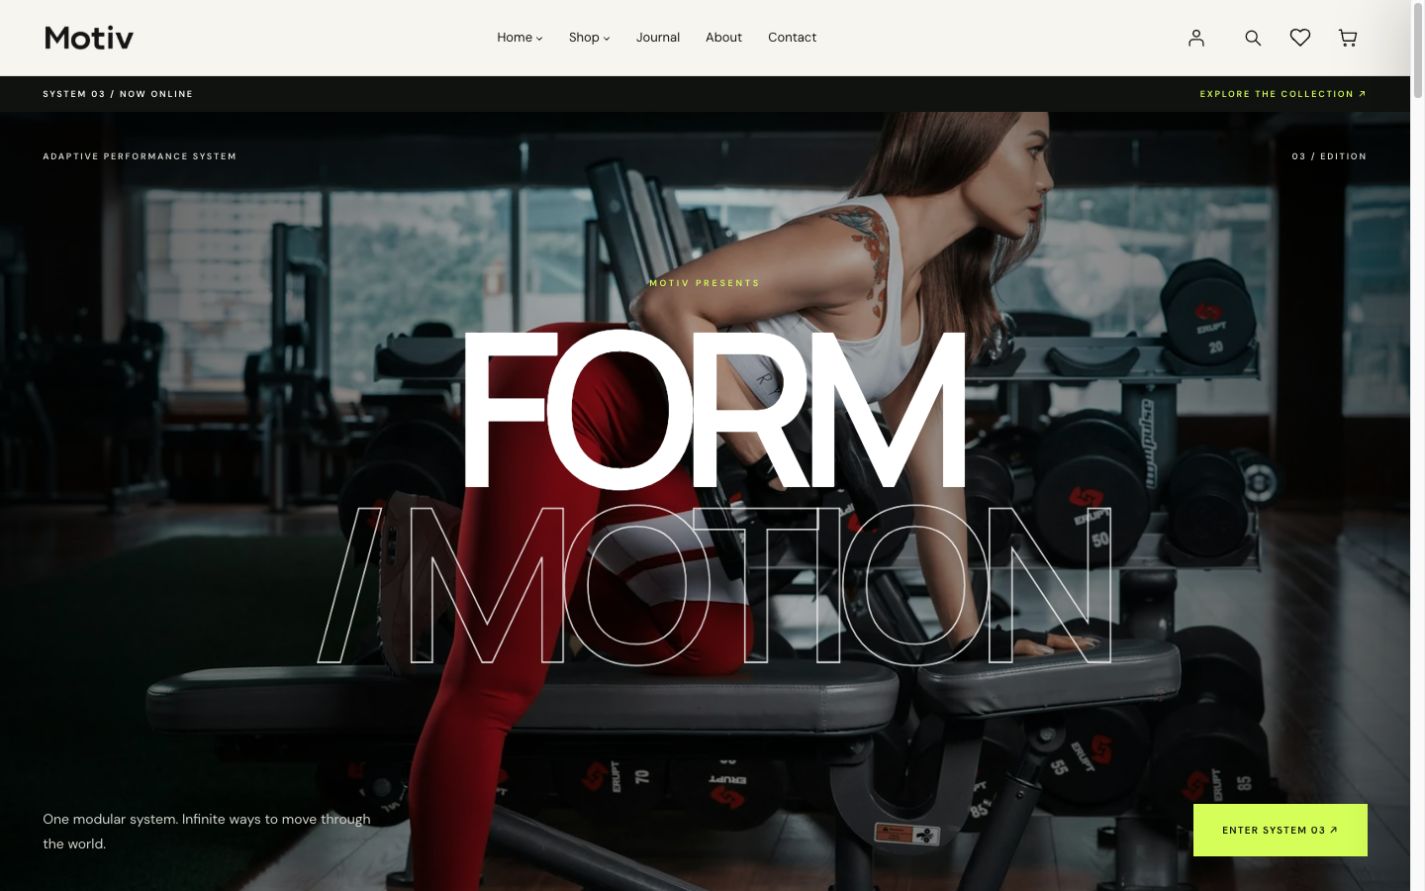
How the pieces work together
The Motiv theme provides layouts, typography, templates and store styling. Motiv Blocks provides the custom blocks, wishlist, quick view and color controls. Motiv Demo Import is an optional setup tool that creates starter content. WooCommerce manages your products, cart, checkout and orders.
Requirements & package
The theme declares WordPress 6.6+ and PHP 7.4+ as its minimum requirements. Use a maintained hosting environment and verify your chosen WooCommerce version’s own requirements. These minimums are not a guarantee of compatibility with every plugin combination.
| File / plugin | Purpose | When you need it |
|---|---|---|
motiv.zip | Parent block theme with embedded TGMPA installer | Always |
plugins/motiv-blocks.zip | Custom blocks and commerce features | To reproduce the Motiv demo |
| WooCommerce | Products, orders and checkout | For an online store |
plugins/motiv-demo-import.zip | Starter pages, catalog, images and menu | Optional demo setup |
motiv-child.zip | Custom CSS and PHP outside the parent theme | Optional code customization |
| Contact Form 7 | Contact page form | Optional |
| MC4WP: Mailchimp for WordPress | Newsletter subscription form | Optional newsletter integration |
The complete package also includes a quick-start file, ZIP checksums, an import test report and this documentation. Extract the complete package first: upload the individual theme and plugin ZIPs to WordPress.
Before you begin
- Use an administrator account with permission to install themes/plugins and upload media.
- Back up an existing website’s files and database. A fresh installation gives the closest demo match.
- Confirm that WordPress can write to its uploads folder and that the host supports WebP images.
- Allow enough disk space for imported originals and the thumbnails generated by WordPress.
Install the theme
Recommended: use the bundled plugin installer
TGM Plugin Activation (TGMPA) is embedded directly in Motiv. You do not need to install a separate TGMPA plugin.
- Upload
motiv.zipunder Appearance → Themes → Add New → Upload Theme and activate Motiv. - Open Appearance → Install Plugins.
- Select WooCommerce, Motiv Blocks and Motiv Demo Import for the full store demo. Select Contact Form 7 if you want the sample Contact form; select MC4WP only if you plan to configure Newsletter.
- Choose Install from Bulk Actions and Apply. Then select the installed plugins and choose Activate. You can also use the individual row actions.
- Complete WooCommerce setup, then continue at Appearance → Import Motiv Demo.
Motiv Blocks and Motiv Demo Import are included as ZIPs inside the theme. The other plugins come from WordPress.org and require a working internet connection. Plugins are recommended according to the features you use; the theme does not force activation or prevent deactivation. The recommendation notice can be dismissed.
Alternative: install the separate ZIPs manually
- Upload the parent theme.
Go to Appearance → Themes → Add New → Upload Theme. Choose
motiv.zip, install it and activate Motiv. - Set up WooCommerce.
Install WooCommerce through Plugins → Add New. Complete its setup so the store pages and database tables are available.
- Activate Motiv Blocks.
Go to Plugins → Add New → Upload Plugin, upload
plugins/motiv-blocks.zip, then activate it. - Add optional integrations.
Install Contact Form 7 before demo import if you want the sample Contact form. Add MC4WP separately if you plan to use Newsletter.
- Choose your starting point.
Continue with demo import, or build pages manually using the block library and theme patterns.
Import your demo
The demo includes six complete Journal articles with featured images, excerpts, tags and the Movement, Style and Design categories. Edit them under Posts before launching your own store.
The importer bundles its demo images and remaps page, product, media and menu references to your installation. You do not need to use the original demo domain or copy database IDs.
- Install the importer.
Install and activate Motiv Demo Import from Appearance → Install Plugins, or upload
plugins/motiv-demo-import.zipunder Plugins → Add New → Upload Plugin. Activation does not import content or redirect you. - Open the import screen.
Go to Appearance → Import Motiv Demo. Motiv, WooCommerce and Motiv Blocks must be active.
- Choose a homepage.
Select Home 1 — Original, Home 2 — Editorial or Home 3 — System. All three page layouts are imported; this choice determines which is used if you apply the settings below.
- Review the two options.
The homepage/currency/privacy checkbox is initially unchecked. Select it to assign your chosen homepage, set the shop currency to USD and assign the sample privacy page when no published policy is already assigned. The branding option imports the demo logo and favicon only when yours are not already set.
- Import and wait for completion.
Keep the page open. Images are processed individually, followed by terms, products, pages and settings. If interrupted, return to this screen and choose Resume previous import.
The demo also includes 3 journal posts, 71 media assets, product galleries, feature content, categories, a native Navigation menu and optional branding. The bundled image files total approximately 6.4 MB before WordPress generates thumbnails.
What the importer preserves
- Existing published pages are reused without replacing their content. An unpublished page with the same slug is preserved and a separate demo page may be created.
- Existing logo, favicon, menu selection and published WooCommerce page assignments are retained.
- Completed imported objects are reused on subsequent imports; customer edits are preserved.
- A conflicting product or variation SKU stops the import instead of replacing your catalog.
After import
Open your homepage and Shop. Check the images, menu and product links, then follow the launch checklist. Demo prices use USD; changing the currency label does not convert numeric prices.
Choose & edit a homepage
| Layout | Page template | Design |
|---|---|---|
| Home 1 | Home 1 — Original | Hero, categories, editorial content and Shop the look |
| Home 2 | Home 2 — Move without limits | Editorial collection stories and product modules |
| Home 3 | Home 3 — Form / Motion | Dark technical direction and modular storytelling |
| Home 4 | Home 4 — Quiet Motion | Warm editorial photography, serif typography and collection directory |
- Open the imported homepage under Pages and edit its blocks. Use List View to select sections.
- In the page settings, keep the matching template from the table above.
- Go to Settings → Reading, choose a static homepage and select the page you want.
- Choose Journal as the posts page if you want the supplied blog archive.
- Save and check the actual front end on desktop and mobile.
Home 4 uses locally bundled photographs and Bodoni Moda typography. Its supplied hero uses a still image rather than autoplay video. The newsletter section uses an available MC4WP form or shows a Contact link when no form is configured. Imported homepage content is editable in the page itself. Templates provide the surrounding header and footer. On an installation without imported Home 1 content, the default Front Page template uses the theme’s starter patterns; edit that template in the Site Editor.
Branding & global styles
Logo and favicon
- Open Appearance → Editor and edit the Header template part.
- Select its Site Logo block and replace the image with your logo. Adjust the block’s width and save.
- Check the Footer Site Logo as well. The demo uses the native Site Logo so both areas can share the same brand image.
- Set the Site Icon in WordPress’s site identity settings. Depending on the WordPress version, this is available in the Editor’s Identity area or under Settings → General.
Use a transparent logo with readable contrast. A square 512 × 512 px icon is a useful starting size. If no logo is set, the theme displays the site title.
Colors and typography
Go to Appearance → Editor → Styles to change global colors, typography and available style variations. Preview headings, body text, forms and product cards together before saving. Some Motiv blocks also have their own background, text and accent controls; update those where a block retains an explicit color.
Layout and spacing
Use List View to select the outer section Group before changing padding or margins. Full-width sections need a template/container that allows full width. Keep important content away from the edges on small screens.
Patterns versus existing content
Insert layouts from the block inserter’s Patterns tab, under Motiv categories. A pattern is a starting layout; editing one inserted copy does not automatically update all other copies. Shared template parts, such as Header and Footer, apply wherever those parts are used.
For WordPress’s editor controls, see the official Site Editor guide.
Products, images & variations
Build your catalog
Open Products → Add New. Set a name, description, short description, price, inventory, categories, featured image and gallery. Use Simple product for a single purchasable item and Variable product for choices such as color and size.
Set up color and size
- Go to Products → Attributes. Create global attributes named Color and Size, with slugs
colorandsize. - Use Configure terms to add colors and sizes. In a Color term, set Motiv Color (hex) to the desired swatch color.
- Edit a Variable product. Under Product data → Attributes, add the attributes, select their terms and enable Used for variations.
- Create the combinations under Variations. Set a price and availability for each purchasable variation.
- Assign the correct image to variations of each color. Select suitable default attributes if desired, then save the product.
Color previews and hover images
Motiv’s supplied product-card layout places color swatches above Select options. A swatch shows the image assigned to an available variation of that color, falling back to the parent product image if no variation image is set. Swatches require visible, purchasable, in-stock variations.
Gallery images also support the card’s alternate hover image. The current card logic prefers a variation gallery when one is available through the product data; otherwise it uses the parent product gallery. Standard WooCommerce supplies a single image per variation. Check that a shared gallery makes sense for all colors.
Image preparation
- Use consistent framing and aspect ratios across your collection. Around 1200 × 1500 px works well for portrait product photography.
- Add front, back and detail images to the product gallery. These also appear in quick view.
- Compress images before upload, retain sufficient resolution for zoom and write descriptive alt text.
- After replacing an image, check Shop, product detail, quick view and Shop the look.
For WooCommerce’s product editor, see the official variable product guide.
Product feature section
The “Why it moves better” section is rendered by the Product Features block. Product-specific copy and imagery are managed by Motiv Blocks.
- Open a product under Products.
- Find the Motiv Product Features panel. If hidden in the classic editor, enable it through Screen Options.
- Enter the Eyebrow, Title and Body. A line break in Title creates another line.
- Enter Stats as a valid JSON array and choose a Feature image.
- Save the product and check its detail page.
[{"value":"4-Way","label":"Stretch"},
 {"value":"Soft","label":"Feel"},
 {"value":"Light","label":"Weight"}]
Keep the Product Features block in the Single Product template and use its automatic product source when you want each product’s own data. Manual block content is useful for a shared section, but it will not become unique per product.
If two products display different sections, compare their feature fields and the block’s source setting. Empty fields may fall back to the block’s defaults or product attributes. The feature section and the related/upsell collections are separate blocks.
Shop the look & hotspots
Use the Shop the Look block to connect an editorial image with products. A hotspot selects the corresponding product panel; available colors come from that product’s variations.
- Edit the page, then select Shop the Look in List View.
- In Lookbook image, choose an image that clearly shows the featured outfit. Adjust the image layout and presentation controls.
- In Hotspots, add or select a hotspot. Give it a useful label and choose its linked product.
- Position the hotspot using the editor controls so it sits on the relevant garment. Repeat for other products.
- Review Product panel options and save. Test each hotspot, color swatch and product link on the front end.
Preview on mobile after adjusting the composition: a crop can move the visible garment relative to its hotspot. Choose a photograph with enough space around the subject and avoid excessive hotspot counts.
Motiv block library
With Motiv Blocks active, open the block inserter and search for a block by its title. Select the inserted block to edit its settings in the sidebar. Some commerce blocks need WooCommerce to provide meaningful product data.
| Block | Use it for | Setup note |
|---|---|---|
| Hero | Opening headline with image/video and calls to action | Replace media, text and button URLs |
| Marquee | Moving strip of short brand messages | Keep messages brief |
| Categories | Image cards linking to collections | Edit card titles, images and category URLs |
| Editorial | Image and text storytelling | Edit image, copy, stats and CTA |
| Shop the Look | Product-linked editorial hotspots | Select a product for each hotspot |
| Promo | Offer or campaign section | Create any advertised coupon in WooCommerce separately |
| Testimonials | Customer quotes | Replace demo quotes with approved real content |
| Newsletter | Mailchimp subscription section | Requires MC4WP and a valid form ID |
| Product Features | Product benefits, metrics and image | Automatic product data or manual content |
| Search Drawer | Header product search overlay | Requires catalog data for product results |
| Wishlist | Saved product page/header interface | Keep Motiv Blocks and WooCommerce active |
The Categories block displays its configured cards; it does not automatically keep titles, images and URLs synchronized after category edits. To show four categories, keep four cards and link each to its actual product category.
Shop, quick view & wishlist
Product collections
The Shop archive, category pages and supplied recommendation sections use native WooCommerce product collections styled by Motiv. Edit their templates or patterns in the Site Editor. Keep the product image, title, price, action and supplied card wrapper together to retain the designed card behavior.
Quick view
Quick view is added to the supported product cards by Motiv Blocks. Its gallery comes from the product’s featured image and gallery; variation options come from WooCommerce. To change its content, edit the product. Test a simple and a variable product after changing the catalog.
Wishlist
Customers can save products through card or detail-page controls and open the header drawer. The Wishlist page uses the Motiv Wishlist block. For a new page, insert that block, choose the Wishlist page template and add a link to your menu.
Guest wishlists use browser persistence; a different browser/device can have different saved items. Signed-in wishlists are associated with the customer account. Private browsing, cleared browser data and cookie restrictions can affect guest persistence.
Cart, Checkout and My Account
Confirm assigned pages under WooCommerce → Settings → Advanced. Cart and Checkout use their WooCommerce blocks; My Account provides the native account endpoints. Keep their required page content when editing the surrounding design.
WooCommerce manages coupons, shipping, taxes, payment gateways, account emails and order confirmation data. A Promo block advertising a code does not create the coupon. Configure that code under WooCommerce’s coupon management before using it.
Journal & supporting pages
Journal
Create articles under Posts with a title, featured image, excerpt, categories and body content. Assign Journal as the posts page under Settings → Reading. The blog archive layout comes from the theme’s blog template; individual stories use the Single template.
About, Contact and policies
Edit their page content under Pages and keep the matching About Us, Contact or Store Policy template. Replace sample text, media and links with your actual brand and store information.
Search results and 404
These are templates, not pages you need to create. Edit Search, Product Search Results and 404 through Appearance → Editor → Templates. Test both an ordinary search and a product search, then visit a nonexistent URL to check the 404 page.
Order confirmation and account endpoints
The theme styles WooCommerce’s order confirmation and account screens. Orders, Downloads, Addresses and Account Details are WooCommerce endpoints of your assigned My Account page; do not create separate WordPress pages for each endpoint.
Contact form & newsletter
Enable your Contact form
If Contact Form 7 was active during import, a sample form is created and linked to Contact. The imported form starts with demo_mode: on and outgoing mail disabled.
- Open Contact → Contact Forms and edit the imported Motiv form.
- Under Mail, set your actual recipient, subject, sender address and message body. Use a sender address suitable for your domain and mail service.
- Enable the primary mail configuration. Disable unused secondary mail.
- Under Additional Settings, remove
demo_mode: on, then save. - Check that the Contact page’s form block selects this form. Send a test message and confirm receipt before launch.
When Contact Form 7 is missing during import, Contact contains a setup paragraph instead of a working form. After installing the plugin, create a form and replace that paragraph with its form block or shortcode. Reimport preserves completed page edits and is not a form-repair action.
See Contact Form 7’s Additional Settings guide for demo mode behavior.
Configure Newsletter
- Install MC4WP: Mailchimp for WordPress and connect your own Mailchimp account in that plugin.
- Create and configure a signup form, including your audience and consent text.
- Select Motiv’s Newsletter block and enter the MC4WP form ID in its settings.
- Preview the front end and test the subscription workflow.
Updates & custom code
- Back up the database and files, including uploads, before updating.
- Test the new theme and companion plugin versions on staging.
- Update the parent theme and Motiv Blocks with their supplied ZIPs using WordPress’s upload/replace workflow.
- Clear relevant caches and verify navigation, images, variations, wishlist, cart and checkout.
Do not edit parent theme files for permanent customizations: replacement ZIPs overwrite those files. Install motiv-child.zip if you need custom PHP or CSS. The parent Motiv theme must remain installed.
Saved template overrides
Site Editor changes are stored in the database and can override updated theme templates. If a template does not show a new default design, review its saved customization. Export or back up it before choosing an available reset/clear-customization action; resetting discards that override.
Moving a site
Use a normal WordPress migration process to move your database, uploads, theme and active plugins, and replace old URLs with a migration tool. Demo import creates starter content; it is not a backup or a full-site migration tool.
Troubleshooting
Install Plugins cannot install a plugin
Confirm your account can install plugins and WordPress has permission to write to wp-content/plugins. Repository plugins need internet access to WordPress.org. For bundled plugins, use a complete Motiv theme ZIP containing its plugins folder; the separate plugin ZIPs provide a manual alternative. For upload size errors, check your hosting upload limit against the theme ZIP size.
“The theme is missing the style.css stylesheet”
Extract the complete package and upload motiv.zip under Appearance → Themes. The outer bundle and plugin ZIPs are not installable themes.
Import stops or the browser is closed
Return to Appearance → Import Motiv Demo and use Resume previous import. Confirm dependencies are active, uploads are writable and the server has enough disk space. Check the specific error before raising host limits. Do not manually remove already imported objects during a paused run.
Import reports a conflicting SKU
An existing product uses a reserved demo SKU. The importer stops to preserve it. Use a fresh installation for the full demo; do not delete real products just to reproduce starter content.
A page did not become identical to the demo
Existing published pages and their content are preserved. Inspect the page and its template; also check Site Editor template overrides. The importer does not replace an existing store with the demo.
Custom blocks are missing or unsupported
Activate Motiv Blocks. If its editor scripts were cached from another version, clear the cache and reopen the editor. Avoid converting unsupported blocks to HTML, because that removes their block controls.
The selected homepage looks wrong
Check Settings → Reading and the selected page’s matching Home template. Imported pages are edited under Pages; the fallback Front Page template may use theme patterns. Preview the front end after saving.
Color selection does not change the product image
Confirm the product is Variable, Color is used for variations, each variation has a price and availability, and each color has a distinct image. Check that the relevant variation is in stock. A missing variation image falls back to the parent image.
Quick view or the drawers fail to load
Check that Motiv Blocks and WooCommerce are active. Test without aggressive script delay/minification on staging and inspect the browser/network error. REST or AJAX endpoints must be accessible to the storefront. Restore the supplied header/card blocks if they were replaced.
The mega menu has no feature image
The featured Navigation Link needs the motiv-menu-feature class and a real product/category destination. Set that product’s featured image or category thumbnail; a generic Custom Link does not supply an image ID.
The Contact form submits but no email arrives
Remove demo_mode from Additional Settings, enable mail and verify sender/recipient settings. Check your mail service and spam folder. Confirm delivery with a real test before launching.
Newsletter is absent
Install and configure MC4WP, create a valid form and set its ID on the Newsletter block. The section is intentionally omitted when no provider form is configured.
Page links show a 404 after migration
Check the published page and its URL, review assigned WooCommerce pages and save Settings → Permalinks. If using pretty permalinks, verify server rewrite rules with your host. Update manually stored links in saved page/template content.
Changes are visible in the editor but not on the site
Save all affected entities, confirm you edited the template used by that page, and clear page/CDN/browser caches. Inspect any saved template overrides. CSS in a custom child theme can also override block styling.
Fonts or animation differ from the demo
The theme uses external Google Fonts and GSAP CDN requests. Blocked requests or optimization settings can change the appearance or motion. Inspect request errors and test optimization changes on staging.
Mobile performance
Motiv uses local fonts and animation scripts, responsive demo hero images, and WordPress-managed deferred scripts. The landing page inlines local styles to reduce blocking requests. Touch devices keep the hero headline visible and skip decorative intro/parallax effects. Product category images use WordPress responsive image sizes.
Enable gzip or Brotli and HTTP/2 or HTTP/3 on your hosting. The local XAMPP demo has gzip enabled separately in its site .htaccess; installing the theme ZIP does not apply that server setting. An Apache compression example is included in apache-performance.conf. On Nginx or managed hosting, use the host’s equivalent configuration.
Measure as a logged-out visitor with the same Lighthouse settings. Scores vary with server response time and device load. If adding page caching, exclude Cart, Checkout, My Account and customer sessions. Retest coupons, cart updates and checkout after enabling optimization plugins.
Before you launch
Use this checklist after replacing the demo with your own store content.
- Set your store address, currency and product prices.
- Configure shipping zones, tax settings and payment gateways in WooCommerce.
- Replace demo products, editorial text, testimonials, contact details and social URLs.
- Publish your actual Shipping, Returns, Privacy and Terms pages and check footer links.
- Confirm logo, favicon, image licensing and image alt text.
- Test simple/variable products, color images, quick view, wishlist and search.
- Test cart quantities, remove controls, coupons, checkout and order confirmation.
- Test registration/login and My Account pages relevant to your store.
- Enable Contact email delivery and configure Newsletter if used.
- Review mobile menus, hotspot positions, keyboard focus and form errors.
- Keep a backup and complete a test-mode order with your payment provider.
Credits & getting help
Theme and companion plugin code are licensed under GPL-2.0-or-later. Demo image assets have their own origins and licenses: product imagery is AI-generated demo artwork, while editorial imagery includes Pexels and Unsplash sources. The importer contains the asset inventory at data/asset-credits.json.
Keep that inventory with your distribution and use images only under their applicable terms. Replace assets where necessary for your store or distribution channel. This guide does not certify marketplace acceptance or third-party extension compatibility.
The embedded TGM Plugin Activation library is version 2.6.1, licensed under GPL-2.0-or-later. Its license and source information are supplied in inc/vendor/tgmpa/ in the theme. Official TGMPA release.
Translate the theme and companion plugins
Translation templates are included at motiv/languages/motiv.pot, motiv-blocks/languages/motiv-blocks.pot and motiv-demo-import/languages/motiv-demo-import.pot. Use Poedit or Loco Translate to create a translation for your site locale, then select that language under Settings → General. POT files are templates; actual translations need PO/MO files.
Keep custom translations outside the theme/plugin folders so updates do not replace them. Standard WordPress paths are wp-content/languages/themes/motiv-LOCALE.mo and wp-content/languages/plugins/motiv-blocks-LOCALE.mo or motiv-demo-import-LOCALE.mo. Theme-local files use languages/LOCALE.mo; plugin-local files use languages/PLUGIN-SLUG-LOCALE.mo.
Block editor and front-end JavaScript translations also require JSON catalogs. Generate them from your PO files using wp i18n make-json path/to/languages --no-purge, preserving the original source paths. For Motiv Blocks, add --use-map=languages/make-json-map.json to map editor sources to the bundled scripts. See each language folder’s README for commands and locations. The bundled installer has a separate tgmpa text domain and POT in inc/vendor/tgmpa/languages/.
Saved page copy, menus, product/category names and demo content are store content. Edit them in WordPress or translate them with a multilingual content plugin. Changing the site language does not rewrite that saved content or override custom block labels.
Right-to-left languages (RTL)
Select an RTL language, such as Arabic, under Settings → General → Site Language. WordPress supplies the RTL direction automatically; no separate theme switch is needed. Motiv and Motiv Blocks adapt navigation, product layouts, forms and drawers to that direction. Photo hotspot coordinates stay tied to the image rather than being mirrored.
RTL layout support does not include translated demo content or complete theme/plugin language catalogs. Translate interface strings using the supplied POT files, and edit or translate saved pages, menus and product content separately. When changing typography, choose fonts that cover your language. Preview desktop and mobile pages after applying your own translations.
Include these details in a support request
- Theme, Motiv Blocks, WordPress, WooCommerce and PHP versions.
- Affected page URL, screenshot and exact steps to reproduce the issue.
- Whether it happens on desktop, mobile, or both.
- Relevant errors with credentials and personal customer data removed.
- Whether the issue persists with optimization plugins disabled on staging.
Contact the theme seller through the support channel included with your purchase. Hosting/mail issues may also need help from your hosting provider; WooCommerce gateway settings are managed by the gateway provider.
Documentation for Motiv 1.0.0 · Motiv Blocks 1.0.0 · Demo Import 1.0.0. Updated October 9, 2026. WordPress menu labels may vary between versions.