The theme
Grocenest
Layouts, templates, reusable patterns, responsive styles and store presentation.
A fresh start for your store
Welcome to Grocenest. This guide takes you from installation to an editable grocery storefront, using the WordPress Site Editor, Gutenberg and native WooCommerce.
Grocenest handles the design. WordPress holds your content. WooCommerce runs your store.
The theme
Layouts, templates, reusable patterns, responsive styles and store presentation.
Optional companion
Adds editable sample pages, products and Media Library images when you explicitly start an import.
The platform
Content editing, catalog data, customer accounts, cart, checkout, payments and orders.
| Component | Requirement |
|---|---|
| WordPress | Grocenest requires WordPress 6.6 or later. Use a WordPress version supported by your installed WooCommerce release. |
| PHP | The theme requires PHP 7.4 or later. Use a currently supported PHP release compatible with all installed plugins. |
| WooCommerce | Required for store functionality and the Demo Importer; installed separately. |
| Contact Form 7 | Optional; provides the Contact form. |
| Mailchimp for WordPress (MC4WP) | Optional; provides the newsletter integration. A connected Mailchimp account and selected Audience are required for signups. |
Check your environment under Tools → Site Health and WooCommerce → Status. This guide describes Grocenest 1.0.0-rc.93 and Demo Importer 1.0.0-beta.2, which are pre-release builds. Menu labels may vary slightly with your WordPress and plugin versions.
Keep both database and uploads backups. A separate staging site is the best place to try the demo before editing an existing store.
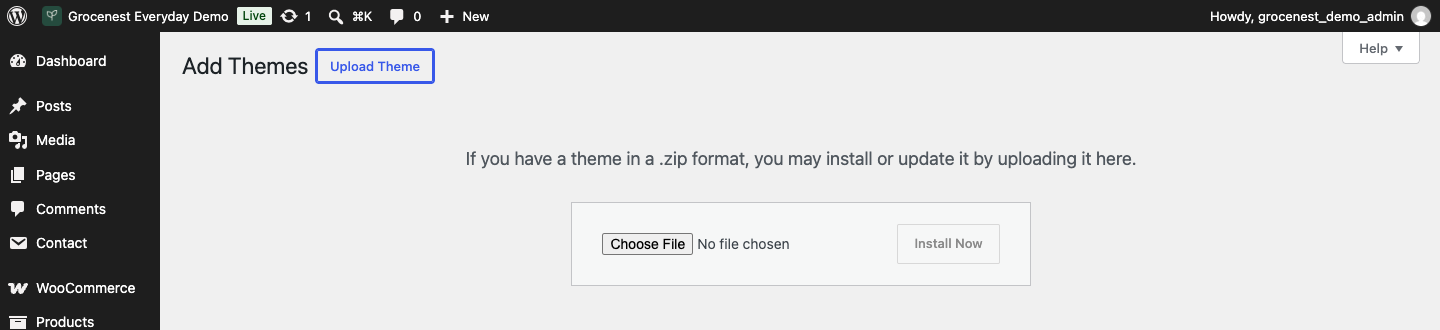
Go to Appearance → Themes → Add New → Upload Theme. Choose the installable Grocenest ZIP, click Install Now, then Activate. The developer-source ZIP is not needed for normal setup.
Go to Plugins → Add New, find WooCommerce, install and activate it. Complete its setup using your actual store information.
Activate Contact Form 7 and Mailchimp for WordPress before importing if you want the importer to create sample forms. Connect delivery services after import.
Use the Demo Importer below, or build pages manually from the Grocenest pattern library.
Activation is intentionally simple. The theme does not automatically import products or pages, install plugins, replace your logo or configure payment gateways.
Upload the theme ZIP through Appearance → Themes. Upload the separate Grocenest Demo Importer ZIP through Plugins → Add New → Upload Plugin. Keep this documentation folder outside the theme uploader.
Home 01
The editorial grocery homepage: fresh finds, departments, market products and stories for home.
Default imported slug: home
Home 02
A neighborhood market composition with an illustrated hero and native product search.
Default imported slug: home-market
Home 03
A seasonal storefront with appetite-led categories, promotions and editorial sections.
Default imported slug: home-seasonal
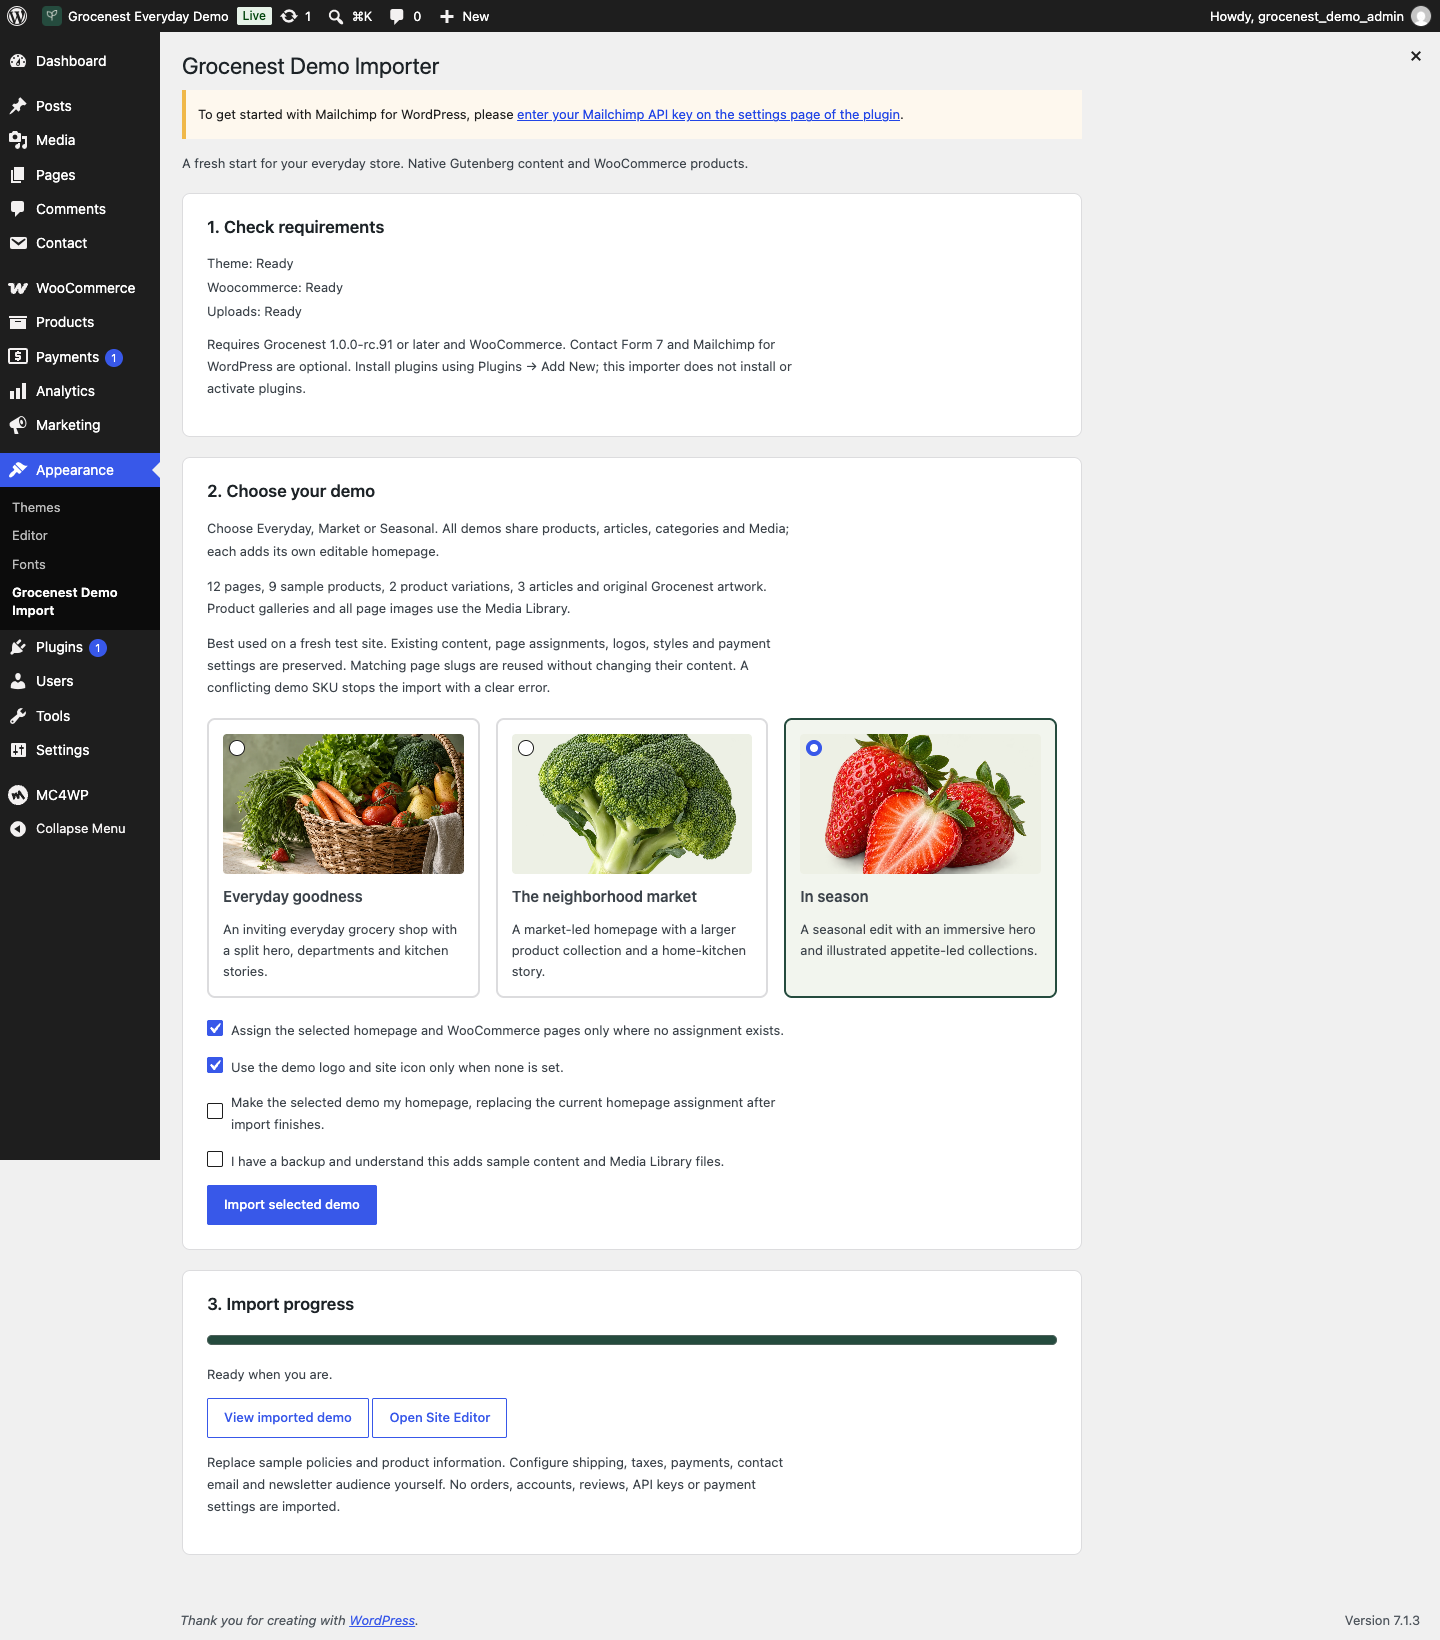
Install Grocenest Demo Importer. Grocenest rc.91 or later and WooCommerce must be active.
Check the requirements panel, then select Everyday, Market or Seasonal.
The page-assignment option fills missing homepage/store assignments. The branding option fills a missing logo/site icon. Existing assignments and branding remain unless you explicitly choose the homepage replacement option.
Check “Make the selected demo my homepage” only if you want the selected page to replace the current homepage assignment after import finishes.
Check the backup confirmation and click Import selected demo. Keep the page open while progress runs.
Click View imported demo. Check pages, products and Media, then replace the sample content before opening the store.
On a fresh site, each demo supplies 12 page destinations, nine shared products, two Pack size variations, three articles, six product categories and 57 bundled images. Existing WooCommerce store pages are reused where available. Importing all three demos shares the catalog, articles and media, and creates 14 total page destinations rather than three separate catalogs.
Store setup is yours. The importer does not copy orders, customers, reviews, passwords, payment settings, shipping rates, tax rules or service credentials. Currency, registration and Coming Soon settings remain WooCommerce settings.
Reopen the importer and click Resume selected demo. A saved job belongs to its selected demo; finish it before selecting another. Repeating an import reuses importer-owned records and preserves merchant edits. There is no automatic rollback or bulk reset. Use your backup to restore a site if needed.
After completion, you may deactivate the importer. Imported content remains in WordPress and WooCommerce. Keep the theme, WooCommerce and any form plugins active for their respective features.
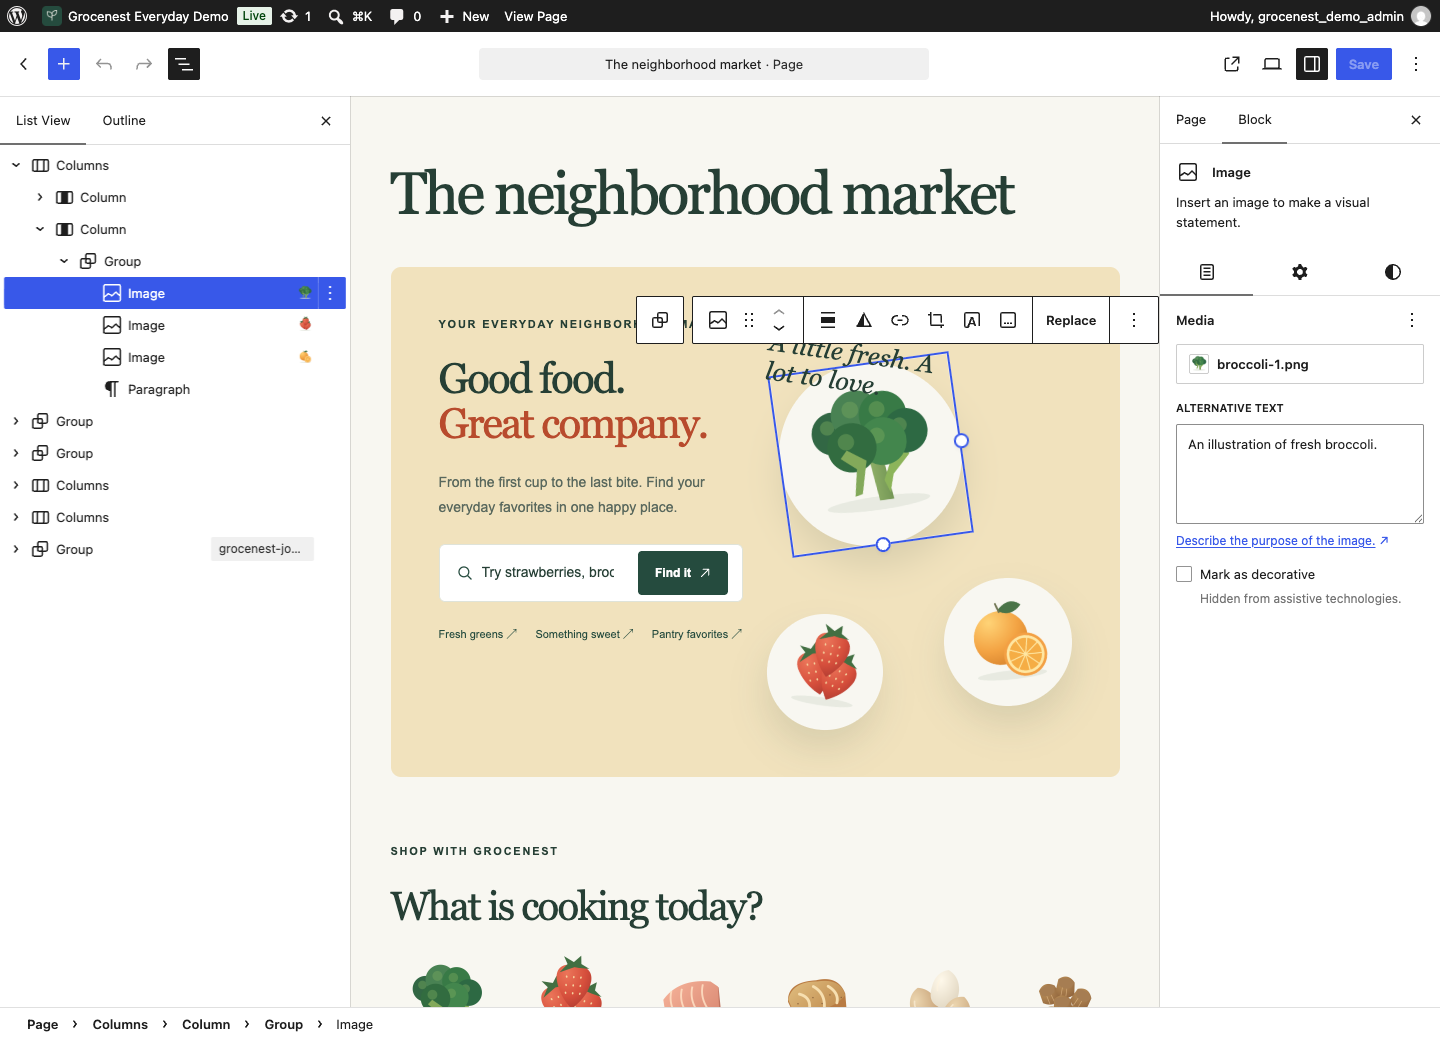
Open Pages → All Pages and edit the imported homepage. Use List View to select sections, headings, images and product blocks.
Go to Settings → Reading. Choose A static page and select your preferred homepage. If you use a separate Blog page, assign it as the Posts page.
Use the matching homepage template in the page settings. The template supplies the shared header/footer and displays the page content.
Open the Header in the Site Editor and confirm that menu links point to your published pages. Existing customized menus are preserved by the importer.
Create a page and open the block inserter’s Patterns tab. Look in Grocenest pages for the matching homepage composition, insert it and select its matching template. Publish the page and assign it in Reading settings. Add your own products, categories, posts and images.
With “Your latest posts” selected, the theme can show its default Everyday front-page composition. For an imported demo, a static page gives you a clear place to edit its full content.
| What you want to change | Where to edit |
|---|---|
| Homepage copy, banners, About, Contact, FAQ and policies | Pages → select page → Edit |
| Article content, featured image and post categories | Posts → select post → Edit |
| Shared header, footer, newsletter and megamenu | Appearance → Editor → Patterns → Template parts |
| Shop, Product Details, archives, Search Results and 404 layouts | Appearance → Editor → Templates |
| Global colors, fonts and style variations | Appearance → Editor → Styles |
| Product descriptions, price, stock, SKU and product images | Products → select product → Edit |
| Contact fields and newsletter messages | Contact Form 7 or MC4WP form settings |
Open List View in the editor toolbar to select nested Groups, Columns and template parts. Select the actual Image, Heading, Navigation or Search block to see its controls. Keep existing layout classes when replacing text or images so that the theme’s responsive styles continue to apply.
A page stores its own content. A template controls the surrounding layout. The Post Content block connects the two; keep it in page templates. Changing a shared template part changes every template that uses that part.
Grocenest patterns give you reusable section layouts. After insertion, edit their native blocks. WordPress may offer synced or unsynced patterns: synced patterns update their linked instances; unsynced blocks are independent. Saved Site Editor templates and parts take precedence over theme defaults.
Before resetting a template: back up or export your customizations. Resetting removes your saved layout changes for that template and brings back the theme default.
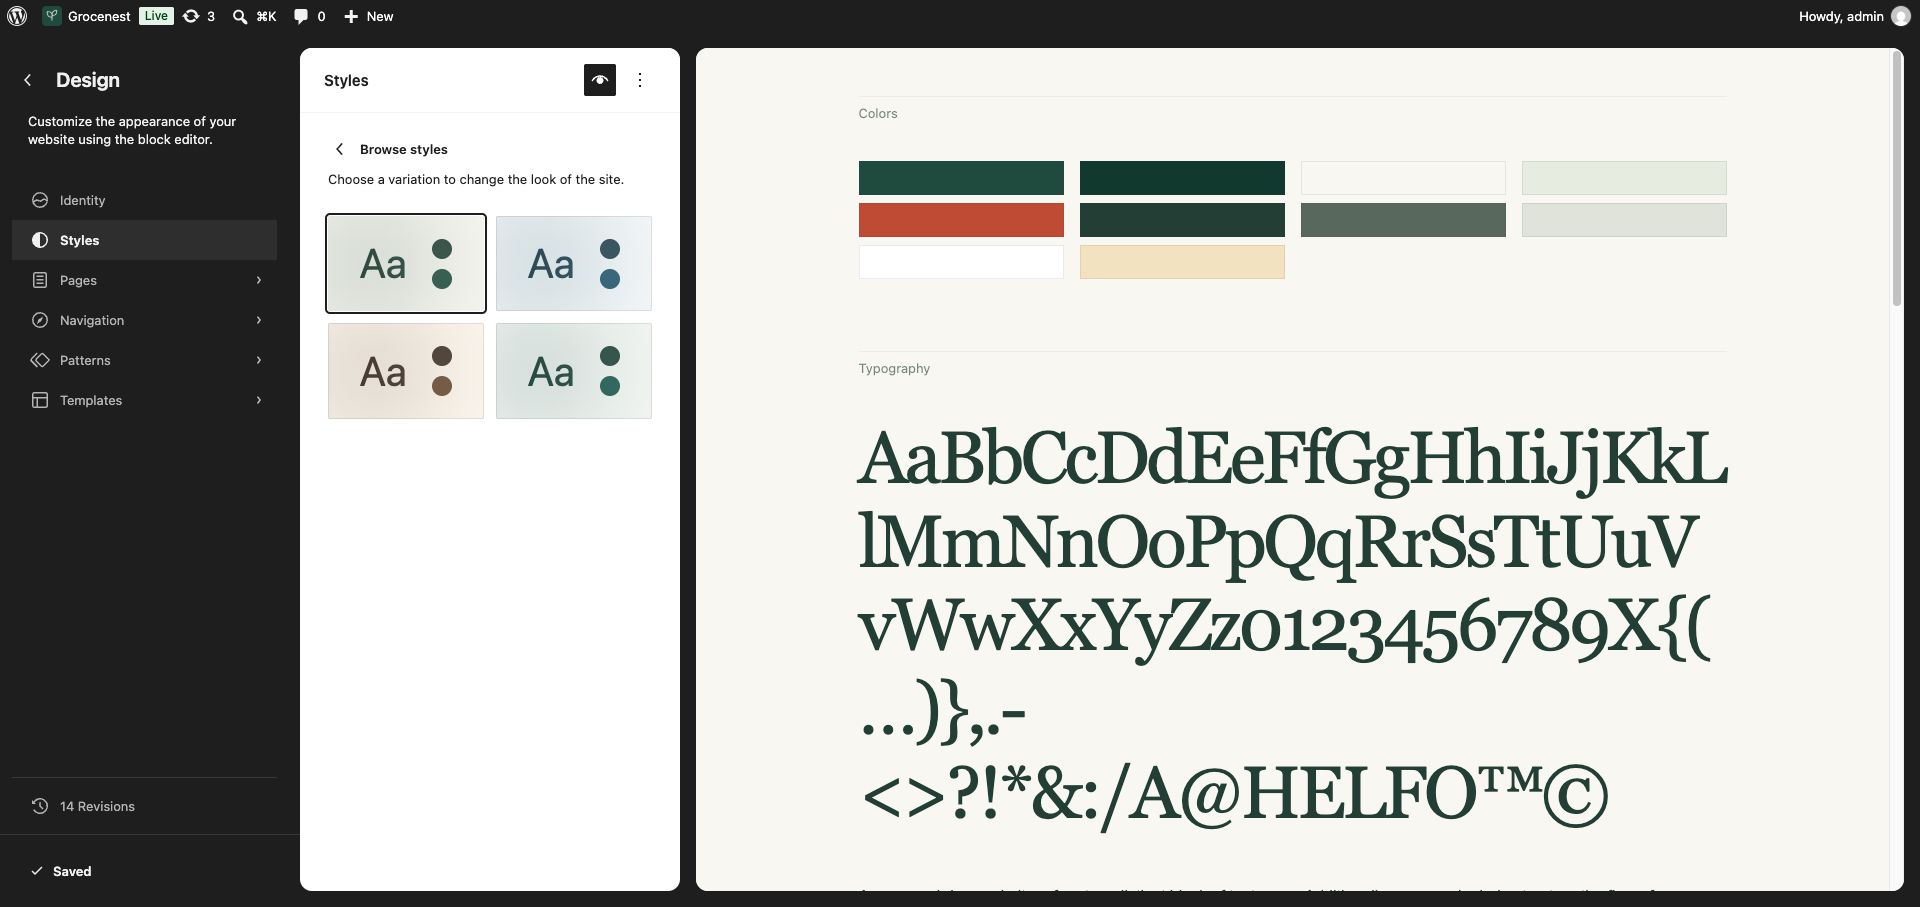
Go to Appearance → Editor → Styles → Browse styles. Preview Default, Harvest, Coastal or Modern Market, then Save.
In Styles → Colors → Palette, adjust Primary, Primary dark, Canvas, Soft surface, Accent, Text, Muted text, Border, Surface and Warm surface.
In Styles → Typography, edit Text, Headings and Buttons. Check the preview before saving. The bundled font choices use system fonts; appearance can vary slightly by device.
Review a homepage, Shop, a product, Cart, Checkout, My Account, a blog article and a help page on desktop and mobile.
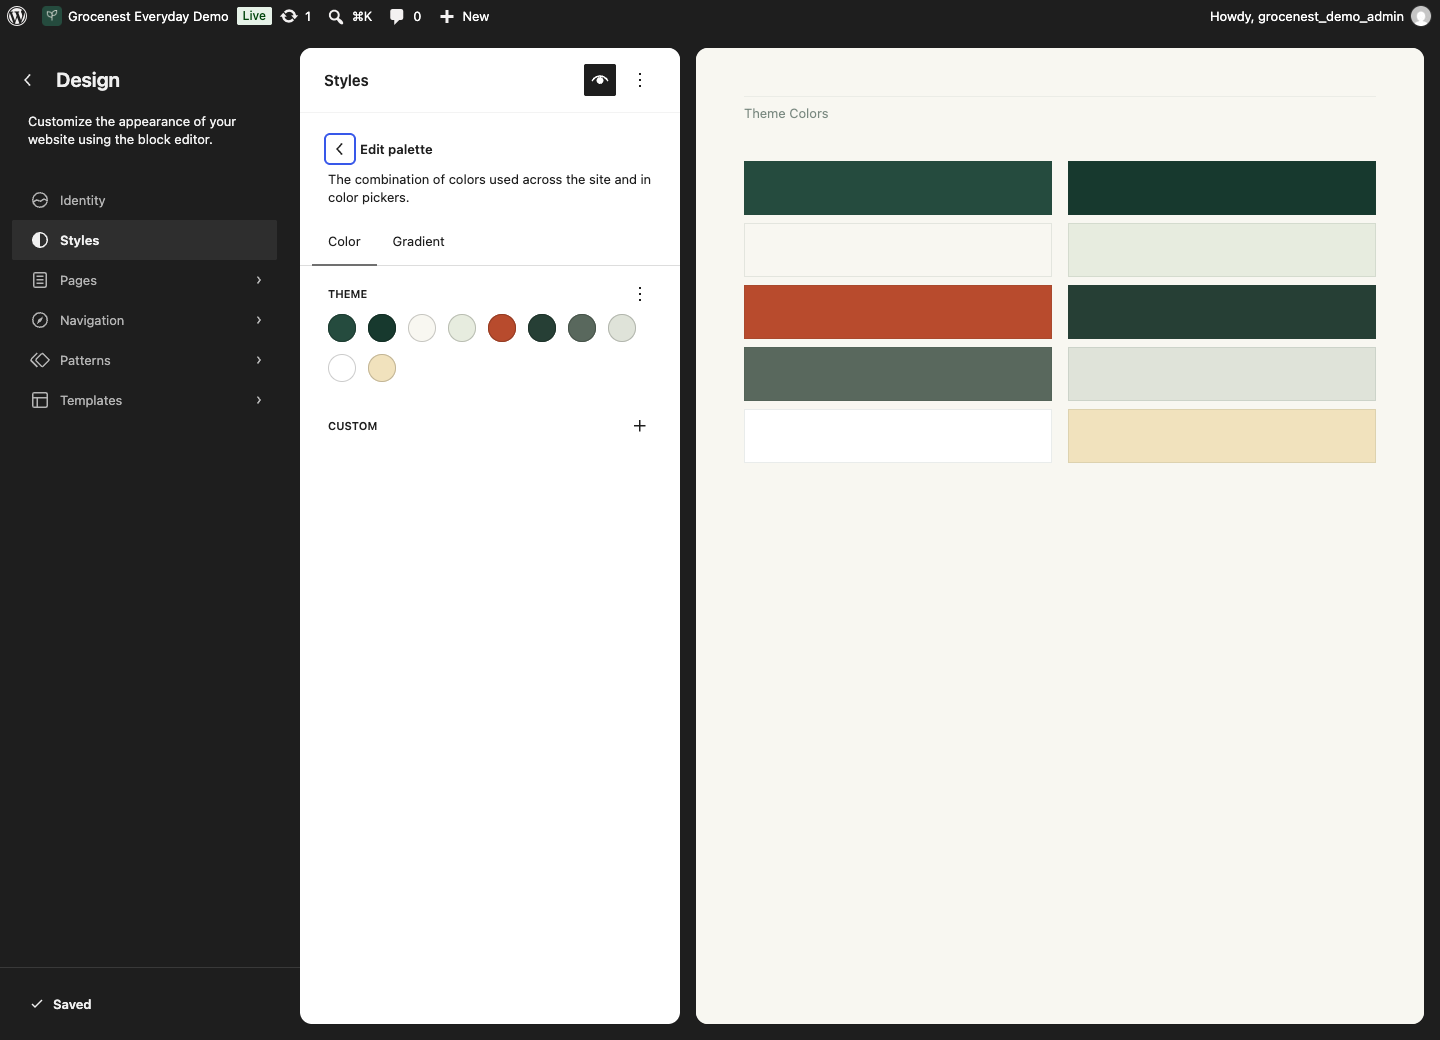
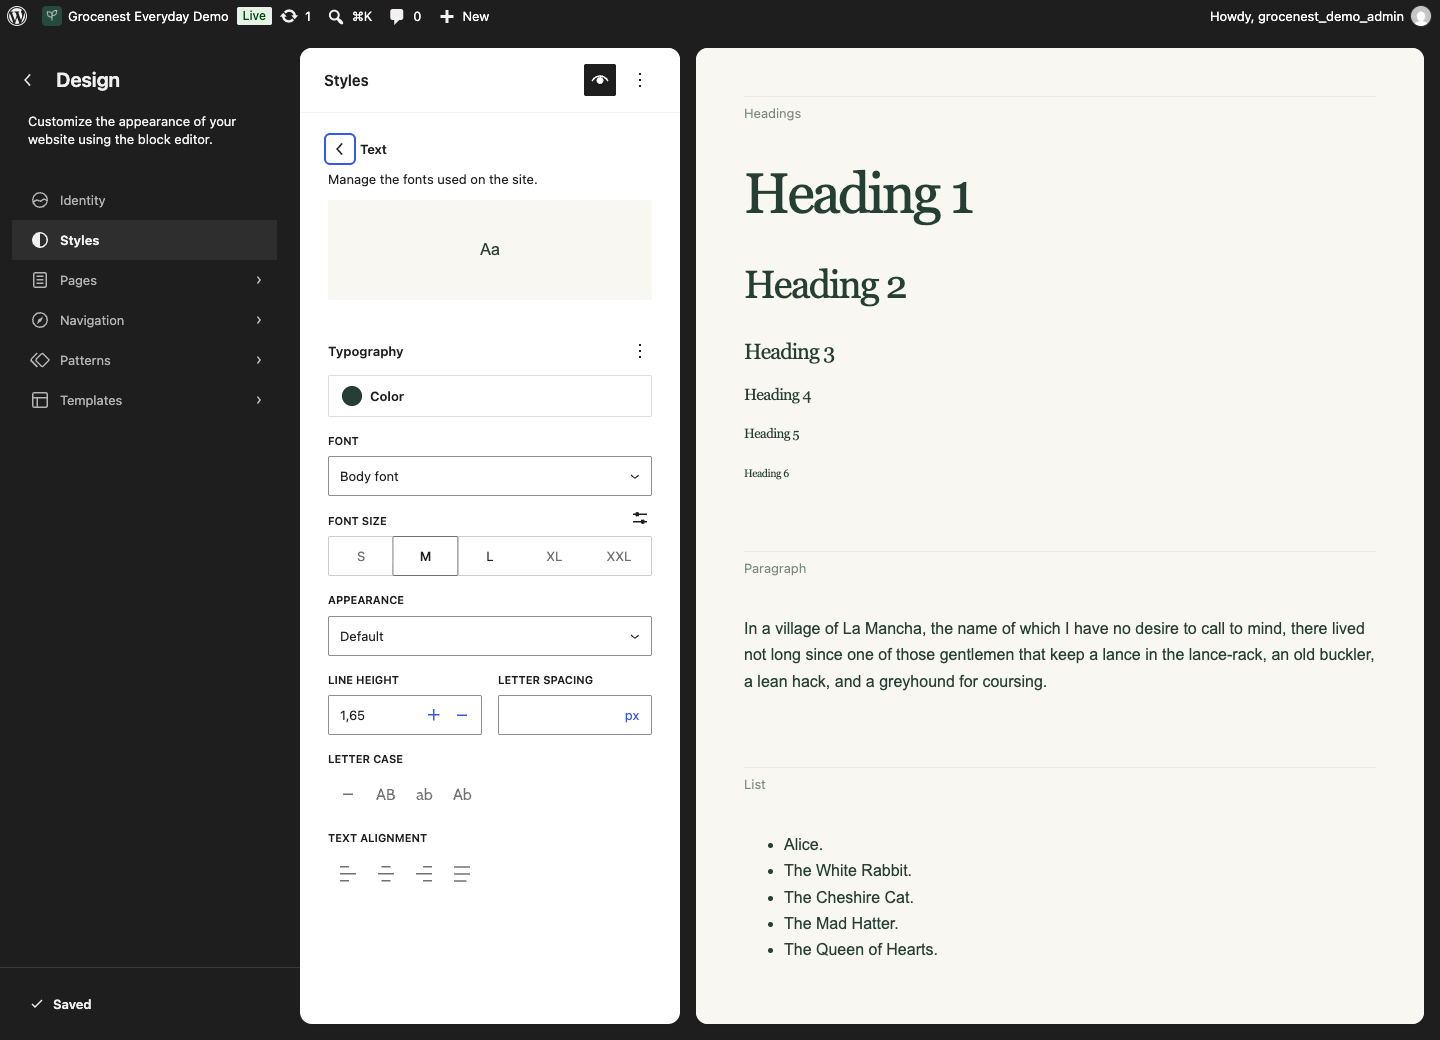
Warm brown tones with Palatino and Verdana.
Blue tones with Georgia and Trebuchet MS.
Green tones with a clean system sans-serif family.
If one block keeps its old color or font, check its individual settings. A local block override can take precedence over Global Styles. Reset that control to inherit the global choice. Photos, illustrations, logos and favicons retain the colors in their image files.
Open the Header template part and select the native Site Logo block. Upload or select your logo from Media Library. Also review the Footer, mobile introduction, Checkout header and Order confirmation header; they can share the same site logo, while their block widths remain editable.
Set your Site Icon in WordPress’s site identity settings (Settings → General on current installations). A square 512 × 512 pixel image is a useful starting point. Use a transparent PNG for a logo that needs to sit on several background colors.
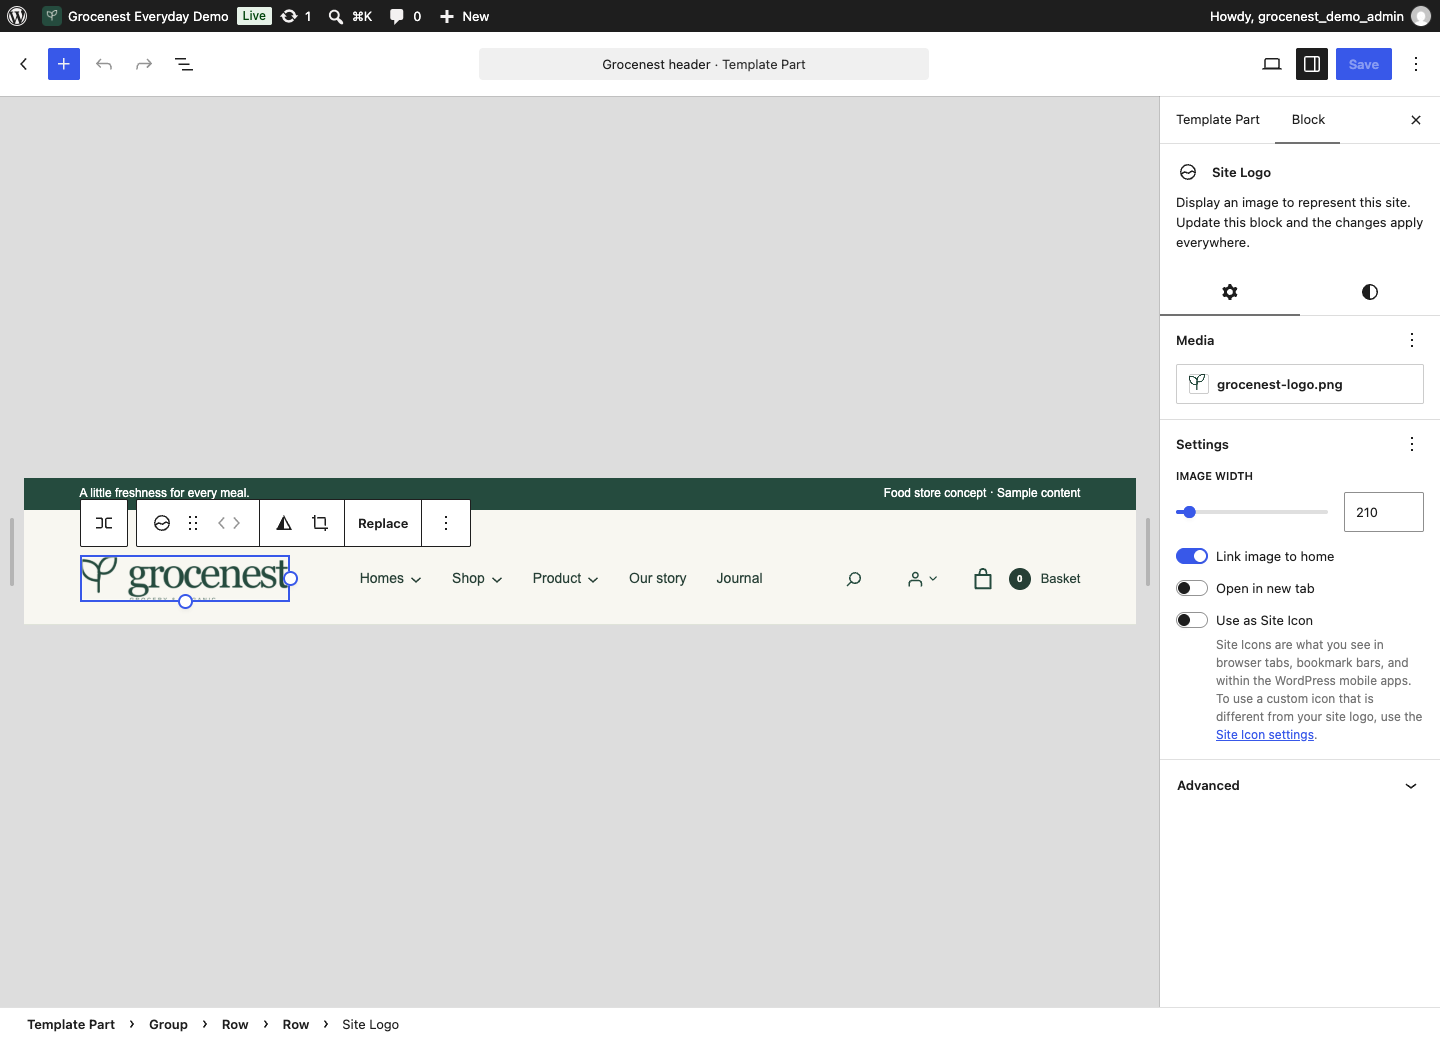
Use List View if the image is nested inside a Group or Columns block.
Select an existing attachment or upload your own image, then confirm the selection.
Keep a suitable aspect ratio. Add a helpful description when the image conveys information; leave alt text empty for purely decorative artwork.
Confirm the subject is visible and the image does not leave an unwanted background rectangle.
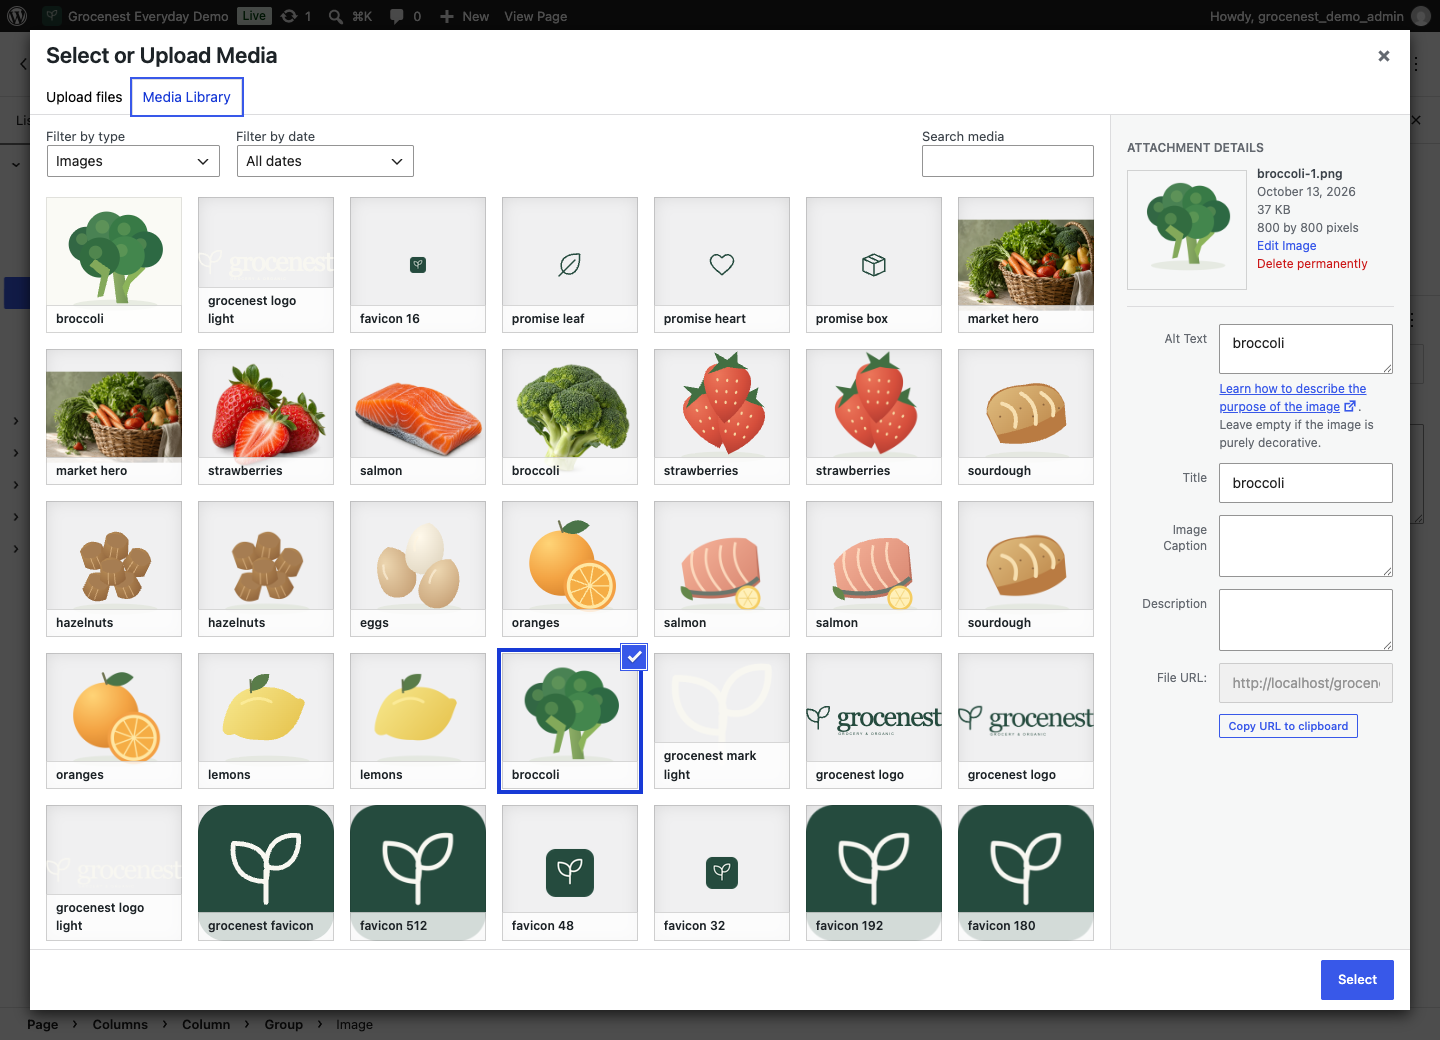
Set the featured image and gallery under Products → Edit product. Set product category thumbnails under Products → Categories → Edit category. Category displays that use WooCommerce thumbnails update from that category data; a manually placed Image block is edited separately in Gutenberg.
Media storage: WordPress keeps attachment records in the database and image files in uploads. The importer copies its artwork into Media Library. Bundled theme files remain fallbacks; no source-site attachment IDs need to be copied.
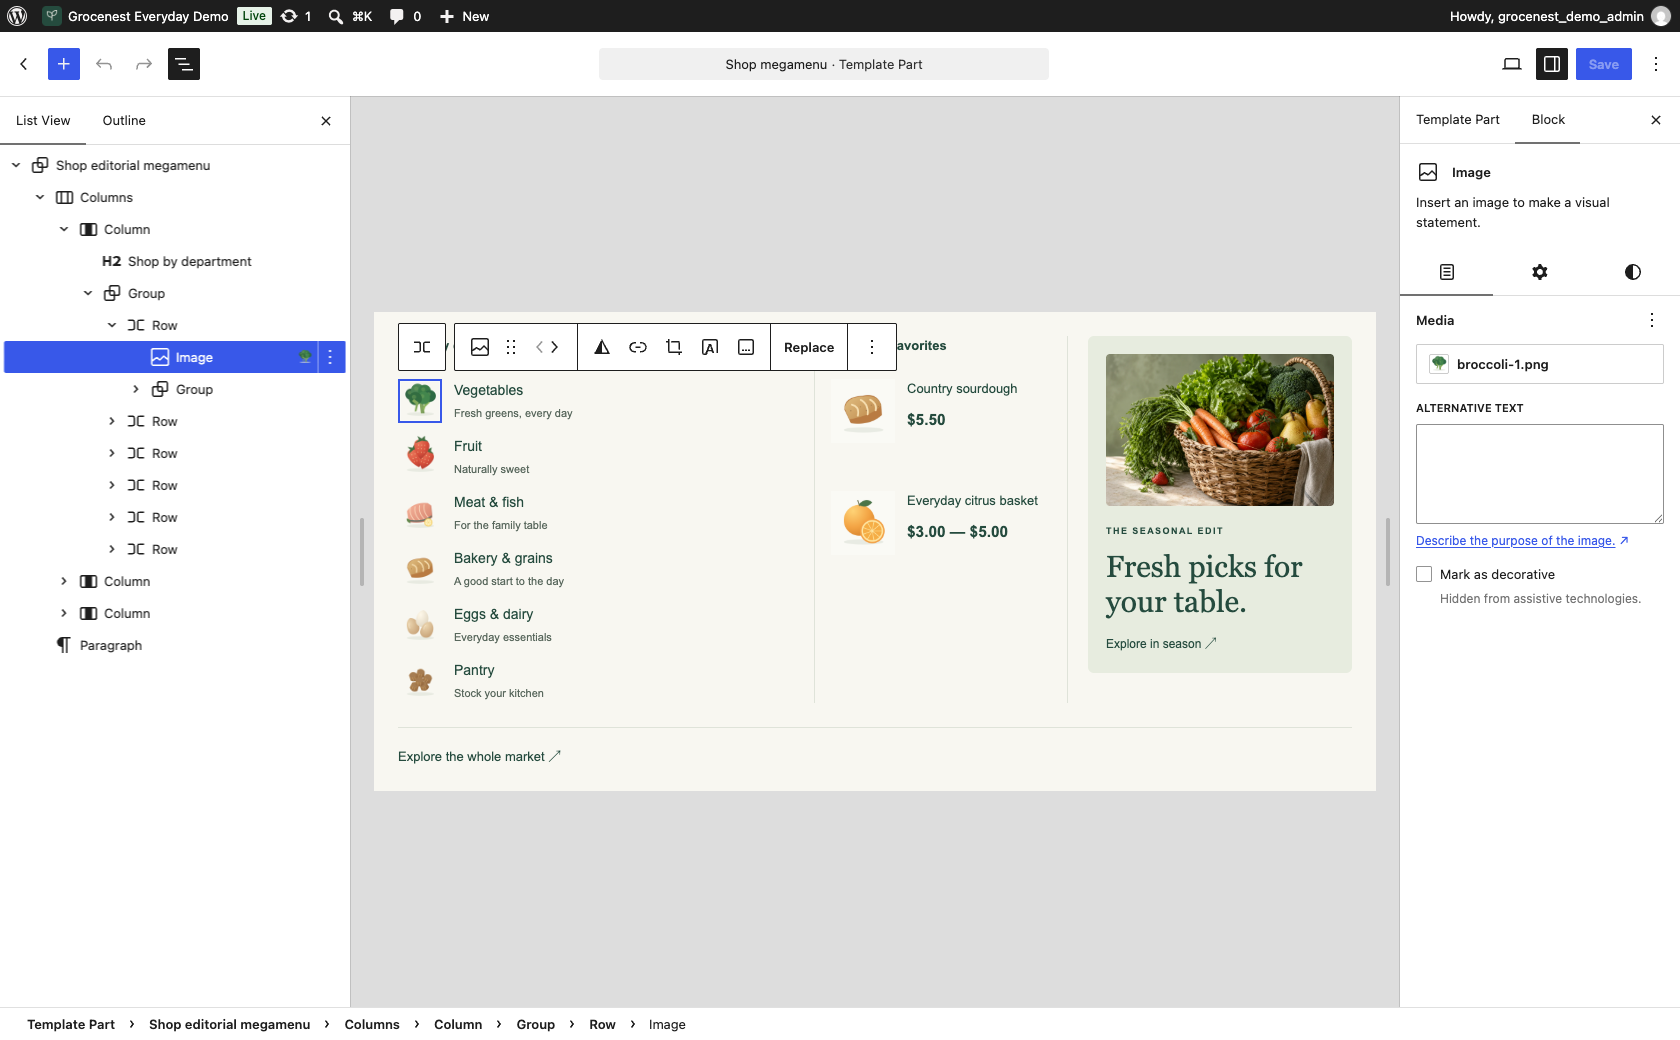
Decorative mobile menu category thumbnails use the theme’s mapped artwork and are separate from editable Image blocks. Changing those mapped thumbnails is a developer task in this build. Use the editable Shop megamenu’s Image blocks for normal visual customization.
The header is a reusable template part. Its topbar, logo, menu, Search, Account and Mini-Cart remain native editable blocks. Select the containing Group or Row to adjust layout, and select a nested block to edit its own content or settings.
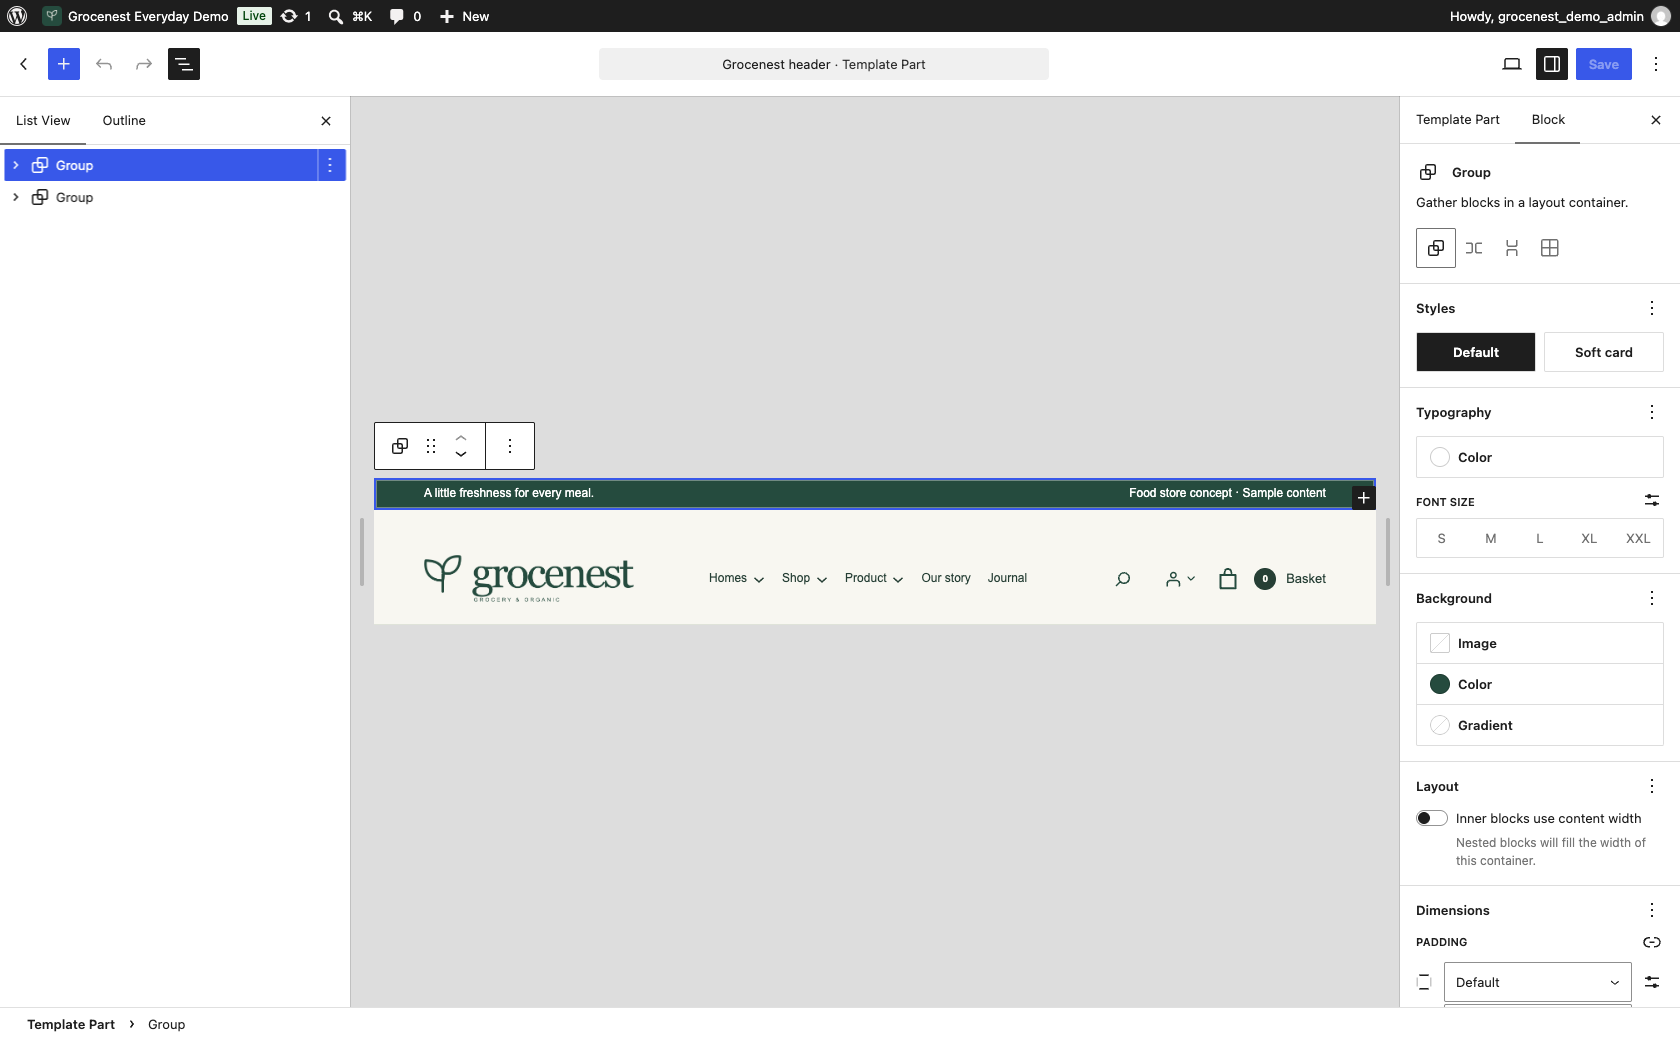
Go to Appearance → Editor → Patterns → Template parts → Header. Select the Navigation block to edit link labels and destinations. Use published page or category URLs from your own site. Edit the Footer part separately for its link columns and bottom text.
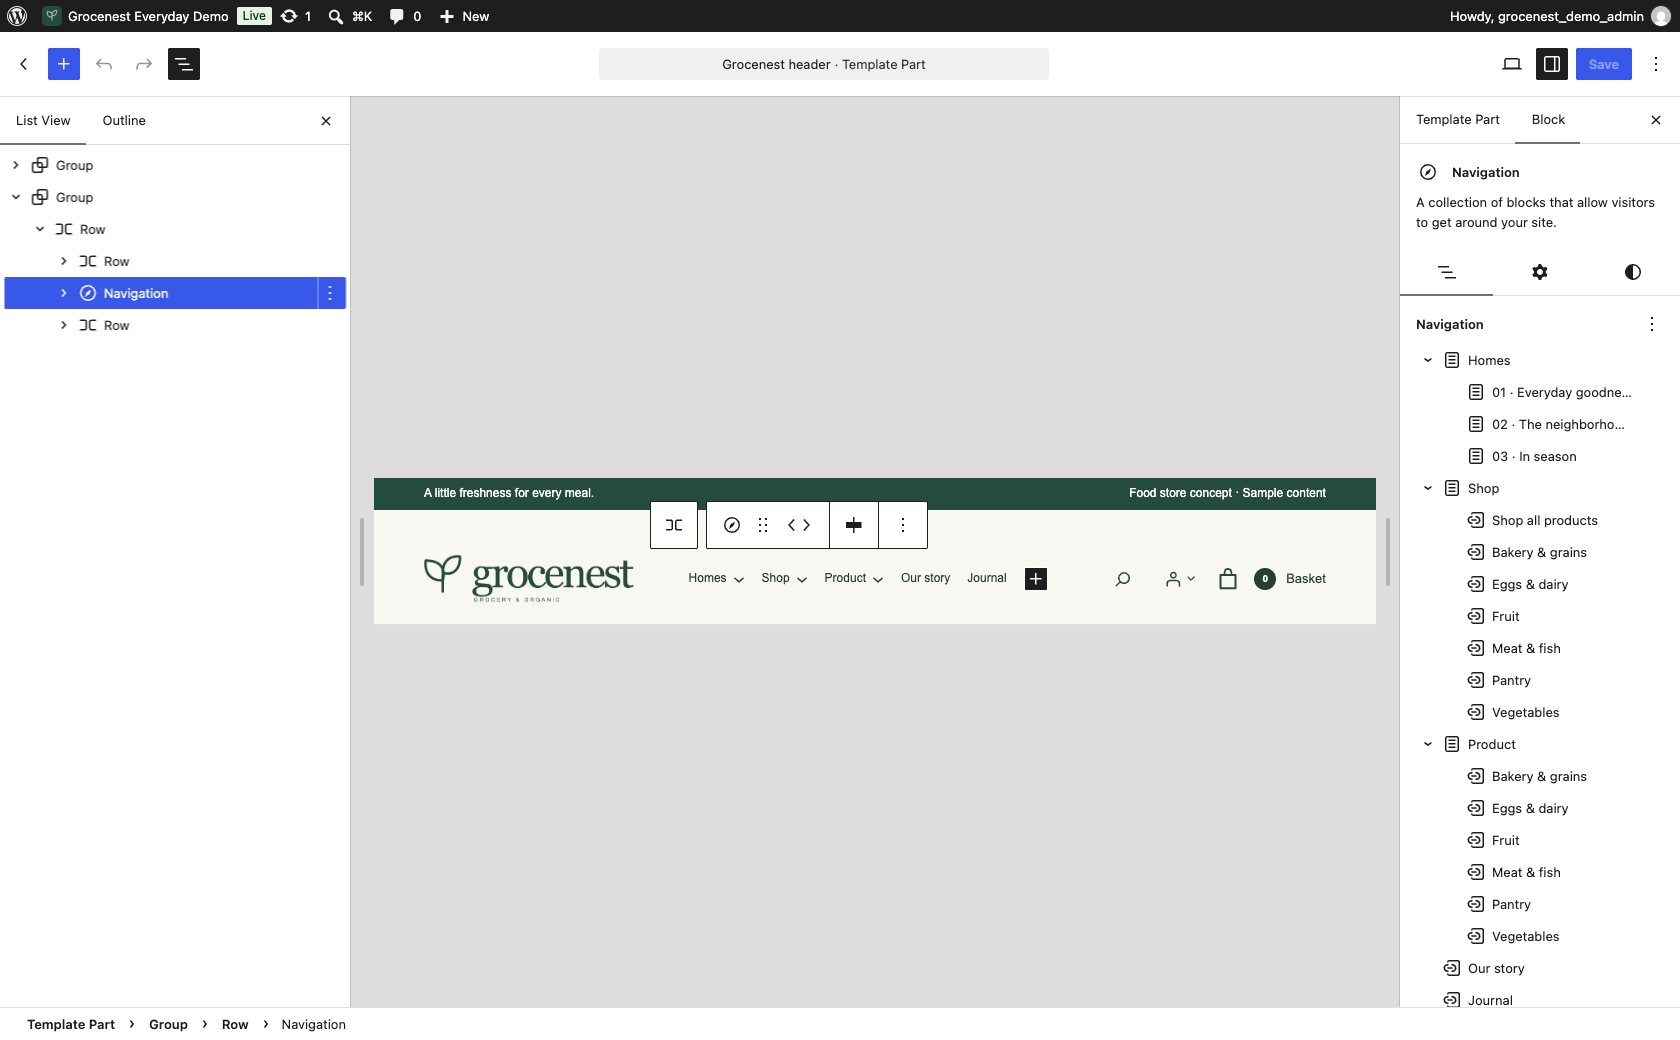
Use the Navigation block’s submenu settings to open submenus on hover. The theme’s Shop megamenu has a maximum 1280 pixel desktop content width. Edit its illustrated departments, product collection and promotion in the Shop megamenu template part. The Header’s Navigation block contains the trigger and mobile links.
Homes and Shop use compact accordion groups in the mobile menu. Their labels and links come from Navigation blocks. Edit the Mobile menu introduction template part for its caption and Search block. Preserve the theme’s existing additional CSS classes if you want to retain its mobile presentation.
Select the WooCommerce Customer Account block beside Search to edit its display/dropdown settings. Guests see Login and, when registration is enabled, Register. Customers use native My Account, Orders, Downloads and Logout destinations. Enable registration under WooCommerce → Settings → Accounts & Privacy if required.
The Mini-Cart block supplies the basket count and drawer. To change “Basket,” edit the adjacent Paragraph in the header’s basket group. Keep the group structure for the label integration.
Select the Search block to edit its label, placeholder and button text. Home Market uses a compact “Find it” action. Keep the native Search block and its product query; avoid replacing it with a Custom HTML form. It submits WooCommerce product searches using WordPress’s normal search handling.
Check pointer hover, keyboard Tab/Enter/Escape and mobile tap after editing menu structures. Long labels should wrap without pushing controls off screen.
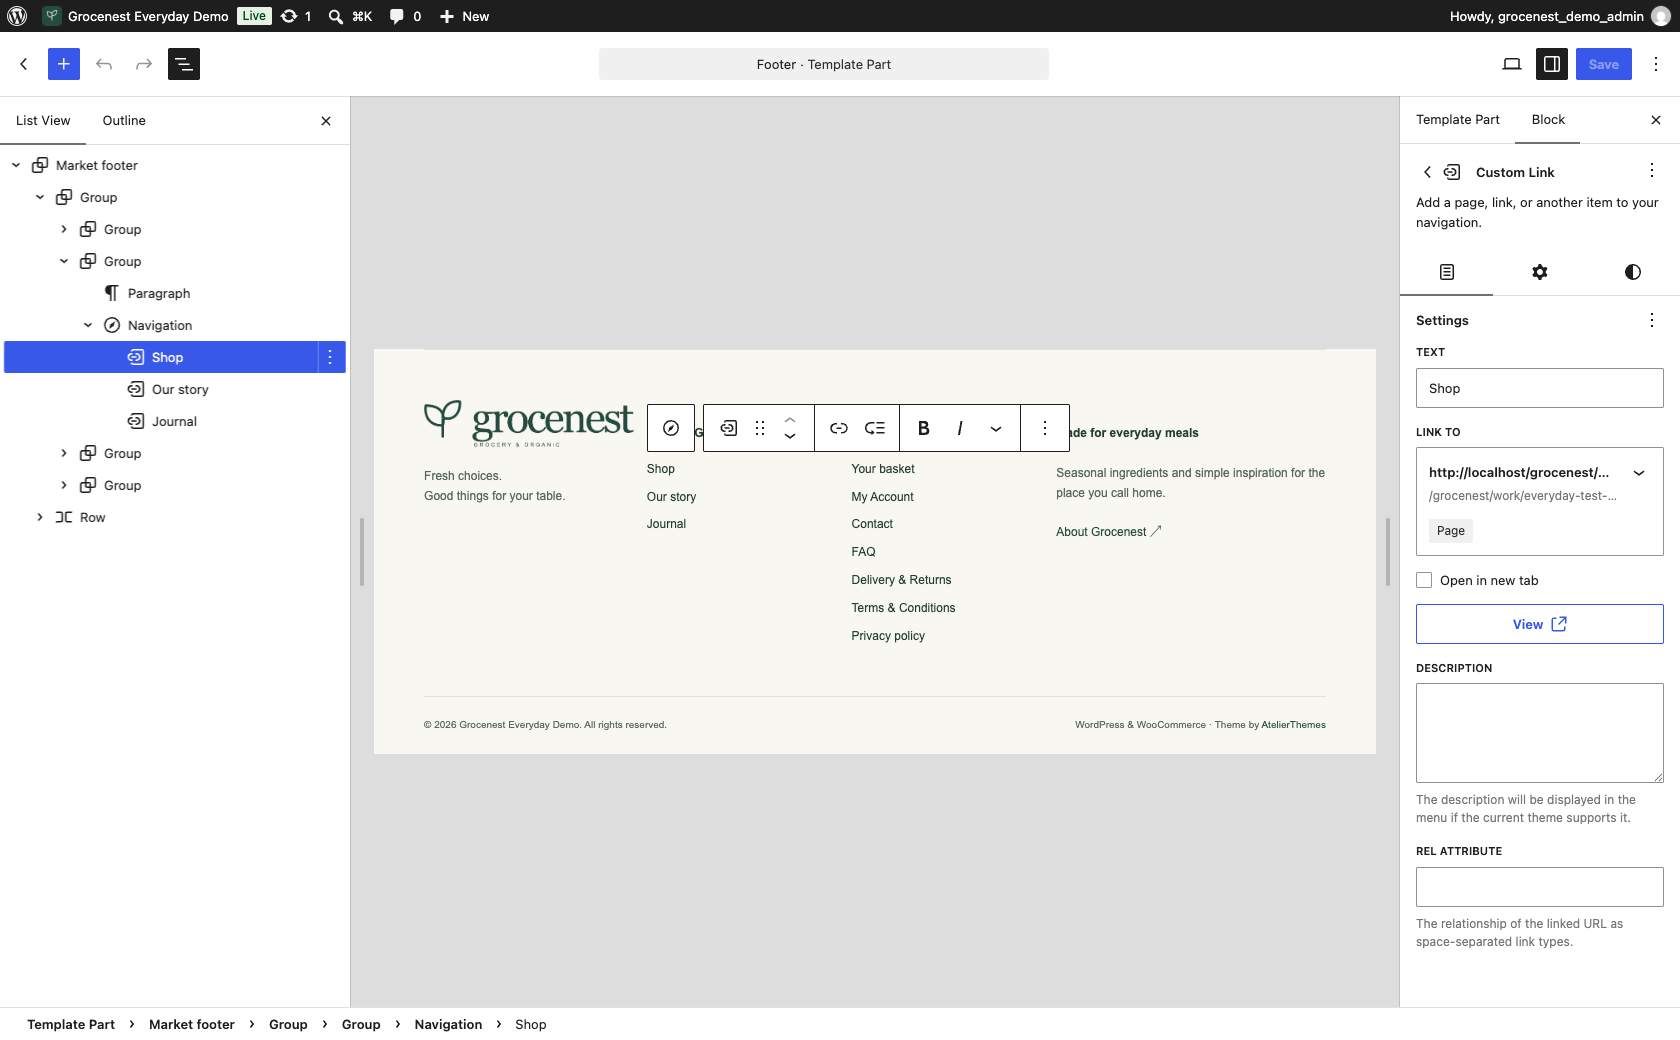
Open Appearance → Editor → Patterns → Template parts → Footer. Expand its groups and columns in List View. Edit the logo, column headings, Navigation links, support copy and bottom line in their respective blocks, then preview your changes before saving. Update shared site information consistently with your other pages.
Edit imported pages in Pages → All Pages. For a manual setup, create a page, insert a matching pattern from Grocenest pages and choose its matching template. FAQ and Delivery & Returns use native Details blocks: edit each summary for the question and the blocks inside it for the answer.
The supplied pages are sample content for you to complete. Replace bracketed fields, store contact information and all example policies with your actual business information. Select the published Privacy Policy page in Settings → Privacy. Assign your published Terms page in WooCommerce → Settings → Advanced when you want it used at checkout.
Set your Blog as the Posts page under Settings → Reading. Manage posts in Posts → All Posts, including featured image, excerpt, categories and article blocks. The assigned Posts page uses the blog template and native post queries rather than its page body. Edit its layout in the Site Editor.
Blog category archives and article-search results use native WordPress data. Product categories and tags use WooCommerce data. Edit their surrounding banner layouts in the Site Editor without replacing the dynamic archive titles or queries.
Open the 404 or Search Results template in Appearance → Editor → Templates. Edit introductory copy, links and layout. These are templates, not pages you need to publish. Keep Search and query blocks in place so the actual query and empty state continue to work.
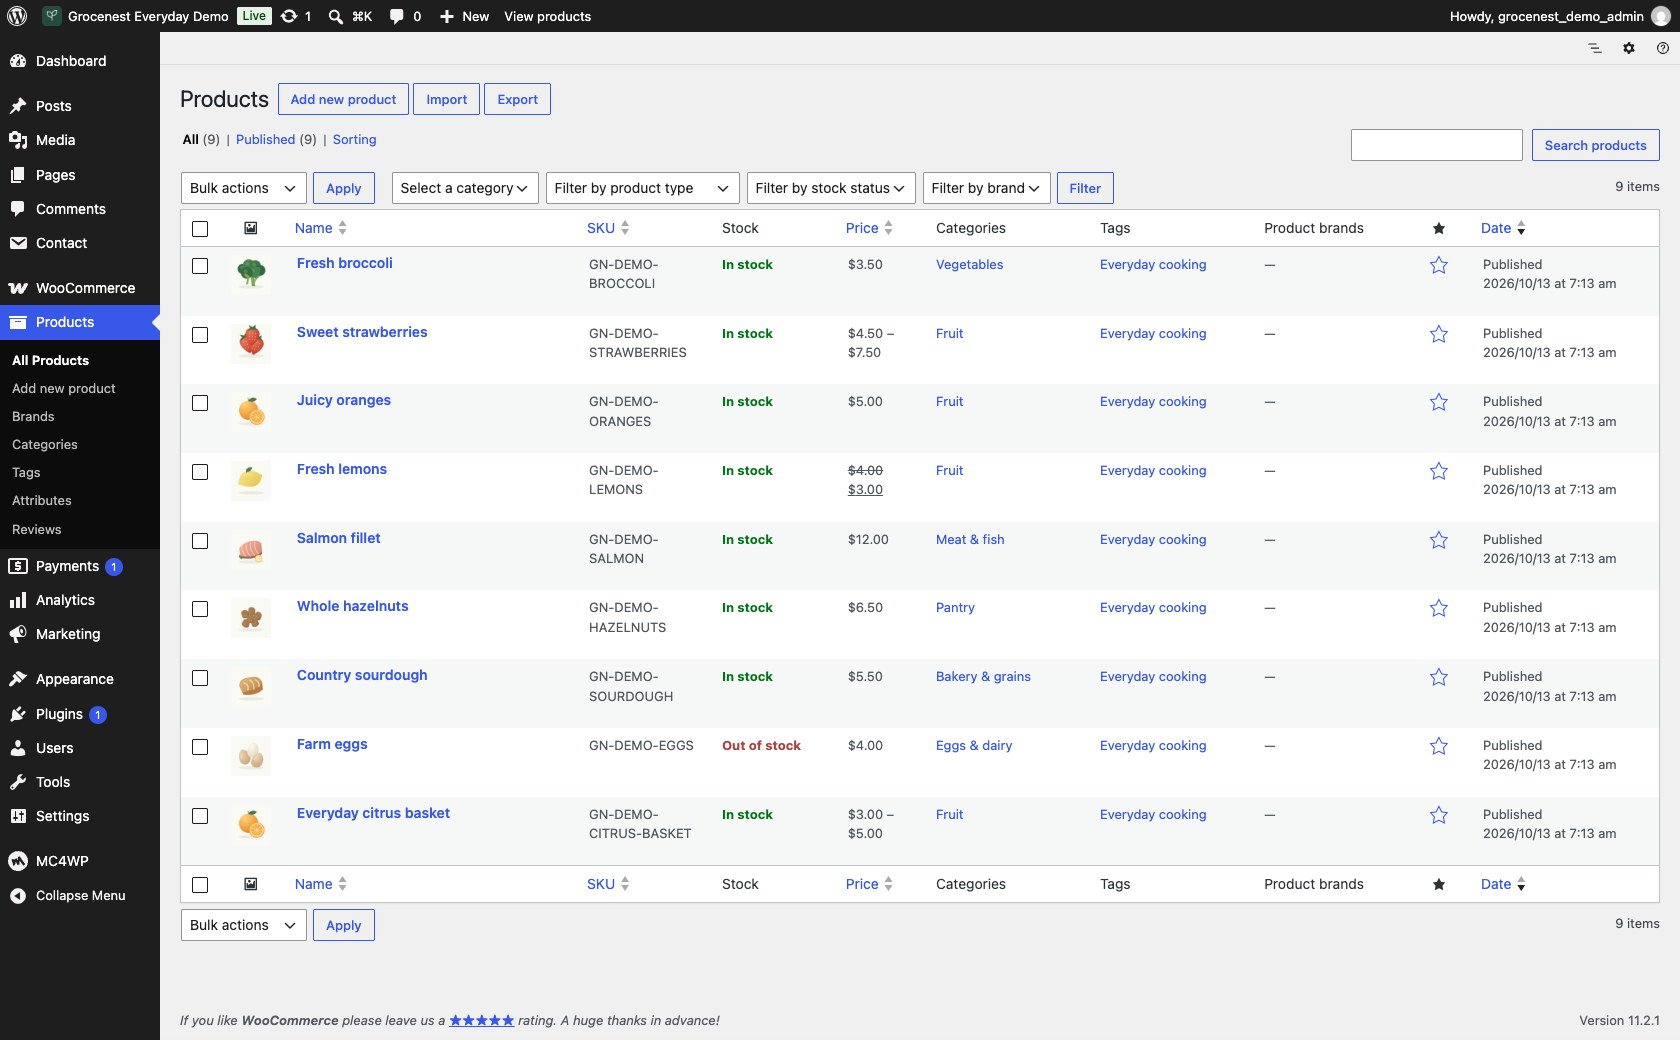
Go to Products → All Products → Edit. Update the title, full description, short description, featured image, gallery, categories and tags. Use WooCommerce’s product data controls for price, SKU, stock, weight, dimensions and shipping information.
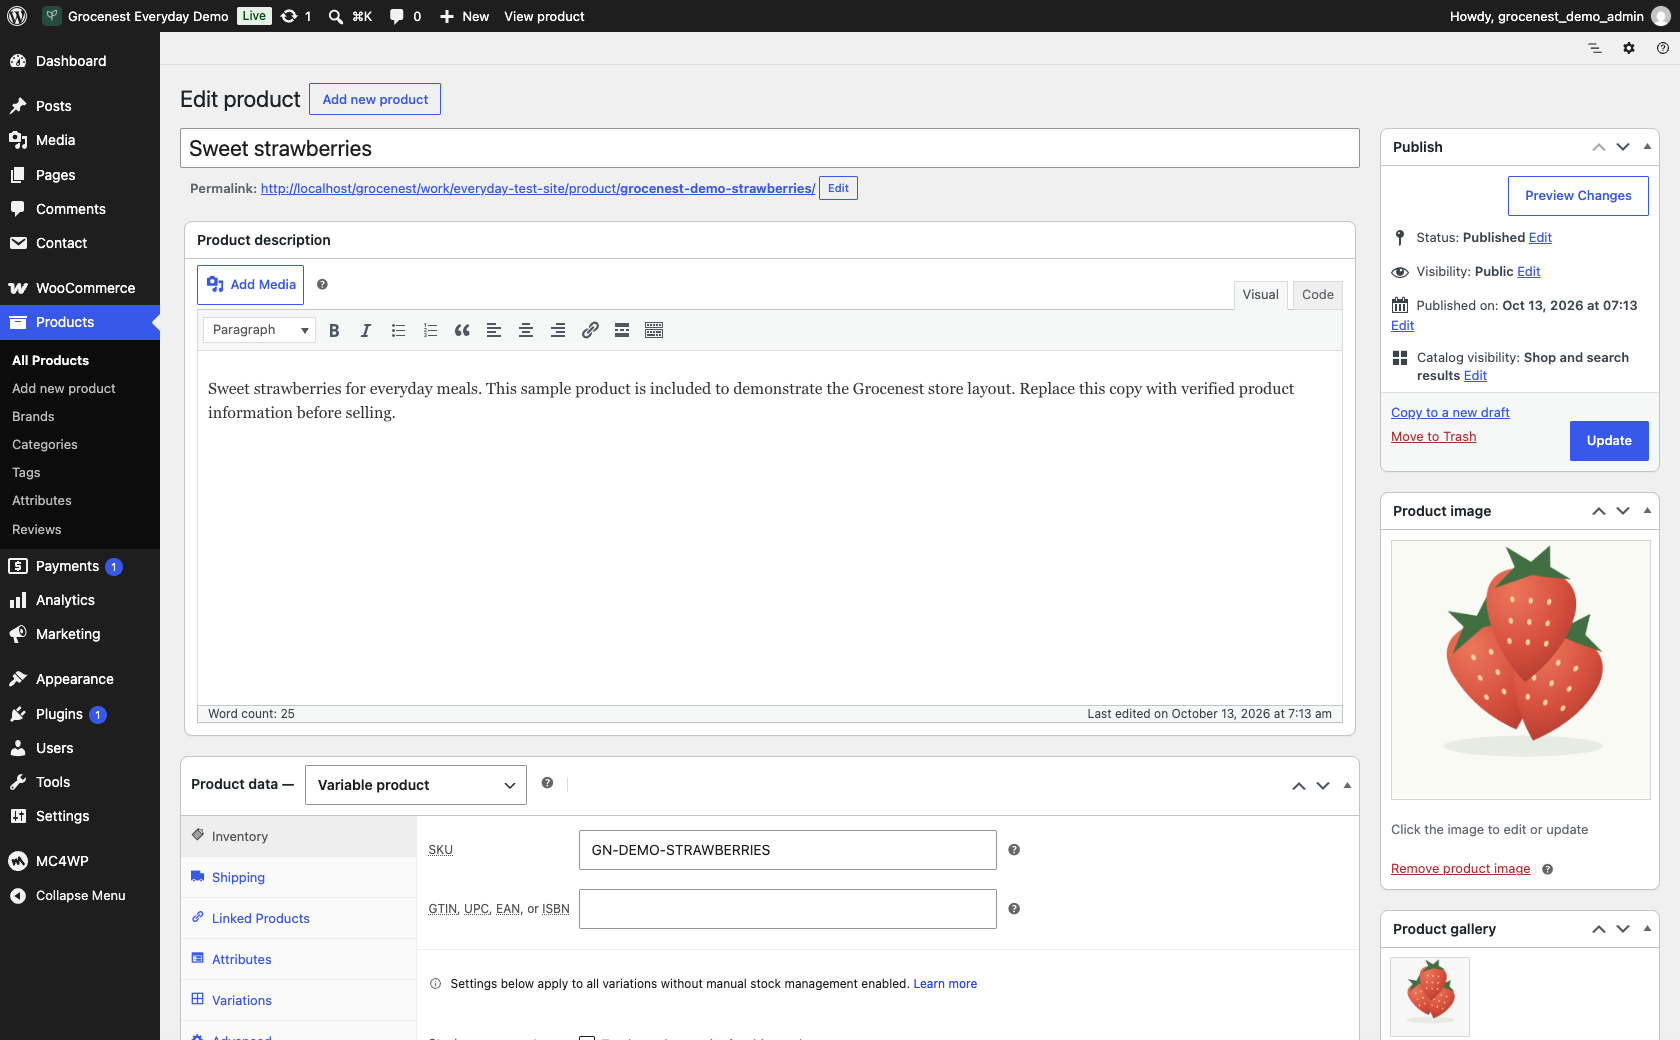
| Product type | How to manage it |
|---|---|
| Simple | Set a price and inventory on the product itself. Add sale pricing only when applicable. |
| Variable | Create attributes such as Pack size, use them for variations, then set each variation’s price, stock and optional SKU/image. |
| Grouped | Link existing child products under Linked Products. Each child keeps its own price, SKU, stock and purchase behavior. |
| External / affiliate | Configure the product URL and button label through WooCommerce. The button opens the configured destination. |
Use the product type selector in the WooCommerce product editor.
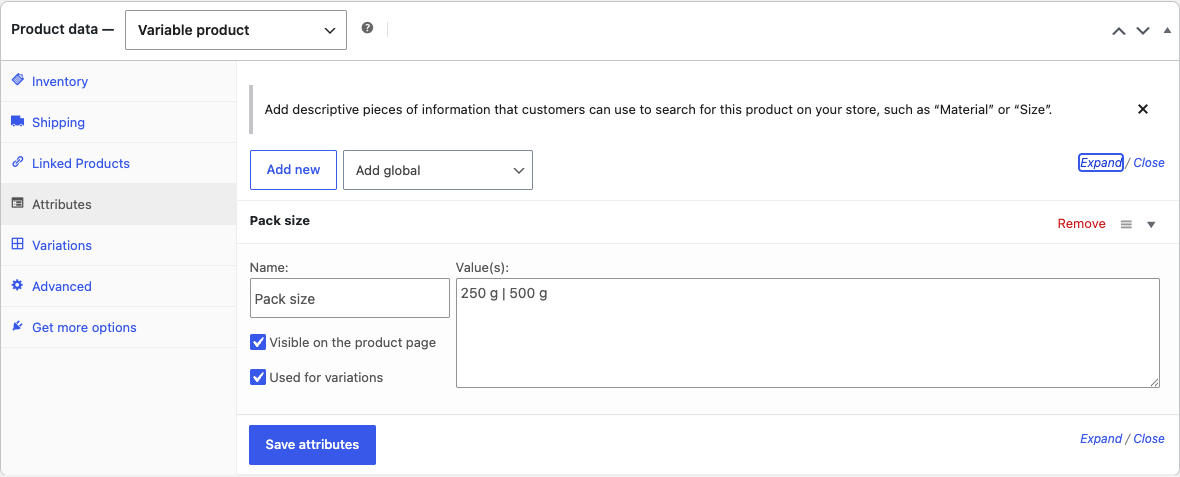
For a local attribute, enter meaningful options separated by a vertical bar, such as 250 g | 500 g. Enable Used for variations, optionally enable Visible on the product page, then click Save attributes. A global Pack size attribute can also be selected if your store already uses one.
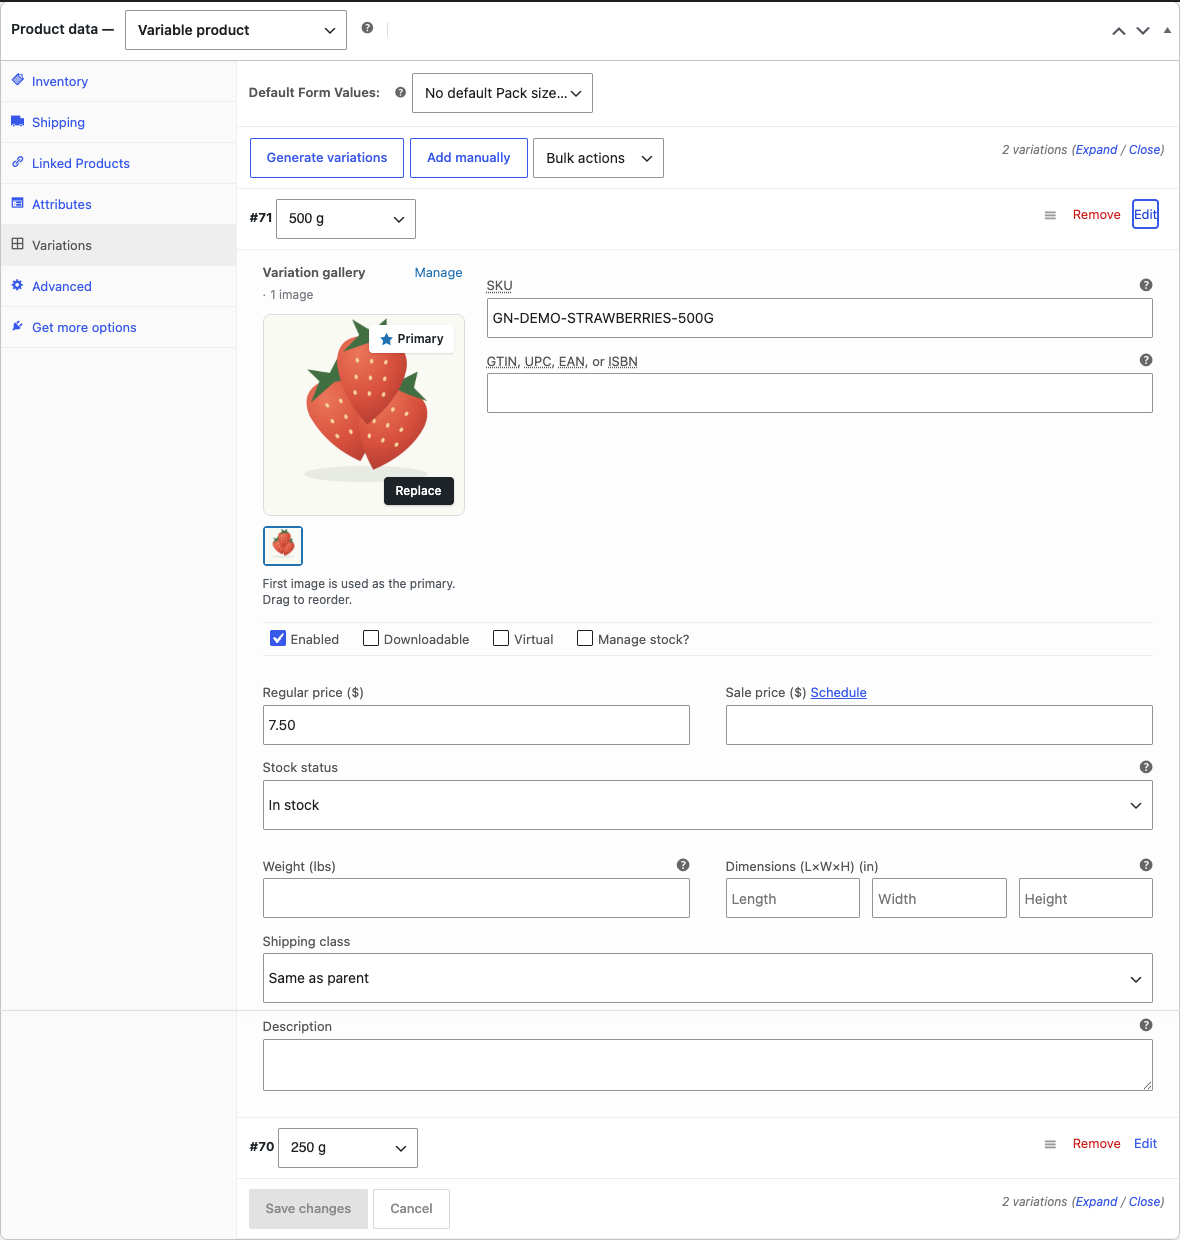
For a new product, use Generate variations or Add manually. Set each option’s price and stock, then Save changes. When changing an existing catalog, edit its existing variations carefully rather than deleting and recreating them.
Save or Update the product, then check every available option, unavailable options, displayed prices and Add to cart behavior.
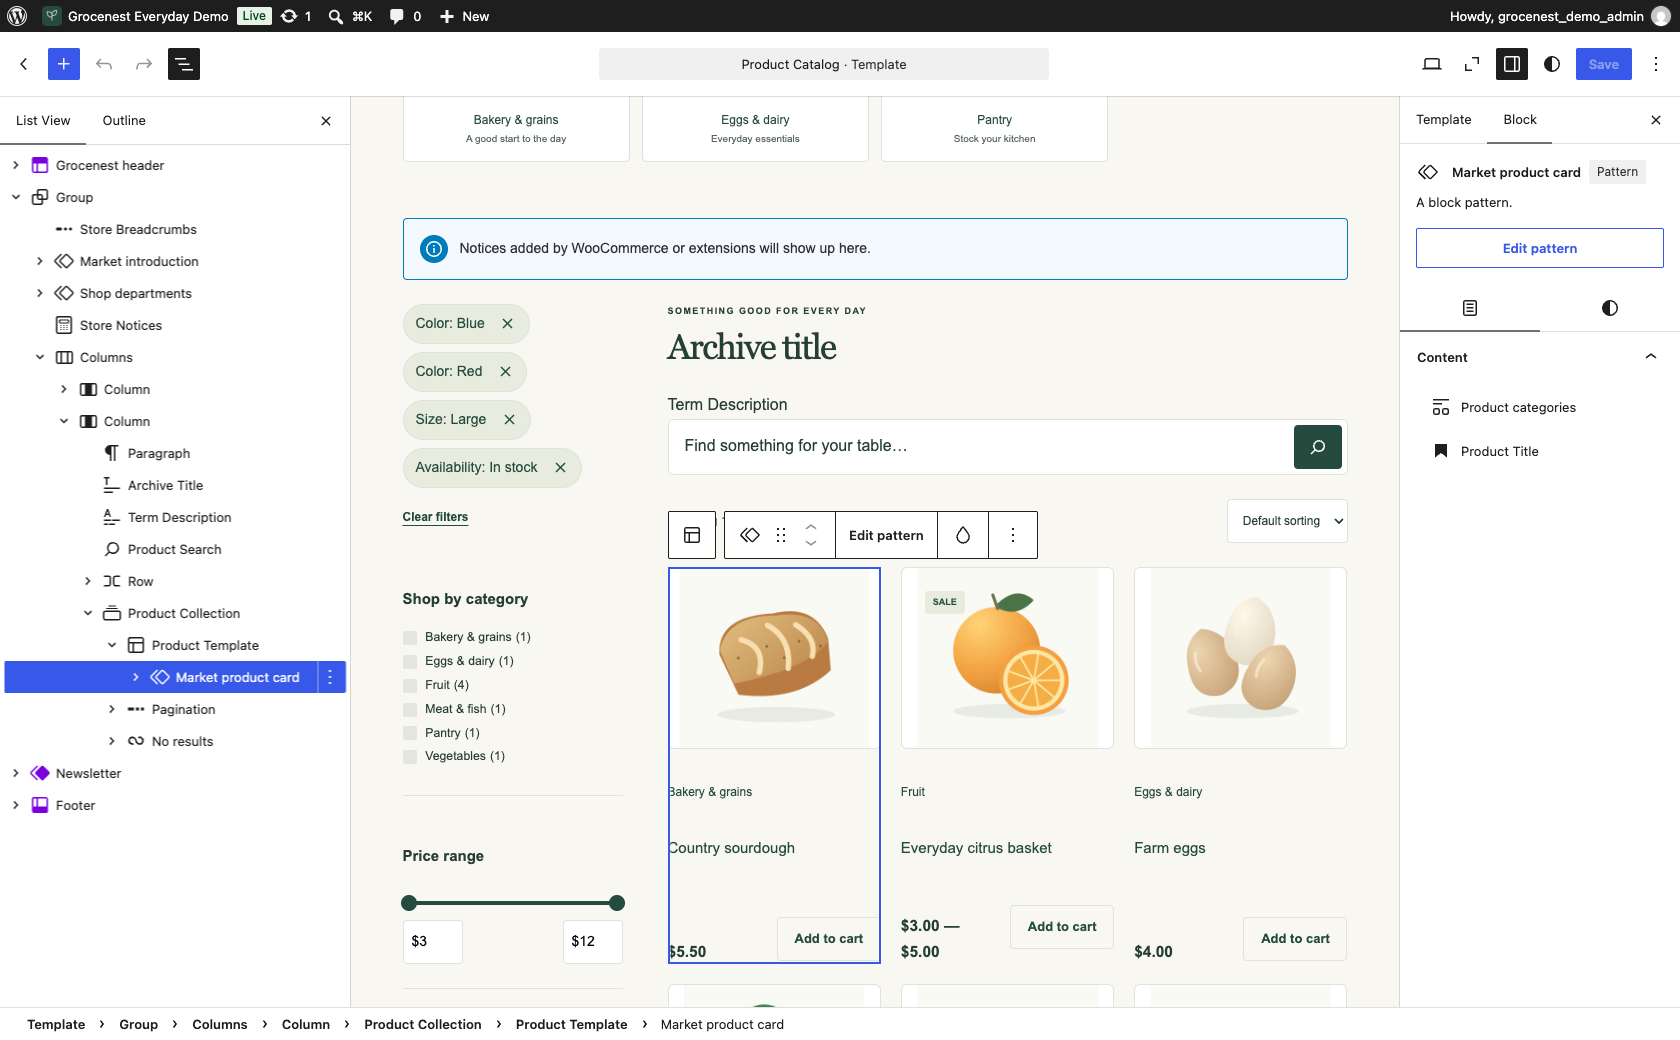
New rc.93 product cards use the native WooCommerce Product Image block’s Cover setting. For an already-saved homepage, open Pages → Edit. For a customized Shop template, open Appearance → Editor → Templates → Product Catalog. In List View, select Product Image inside the product card and choose Cover / Fill instead of Contain / Fit, then save. Cover may crop a small part of a square image to fill a wider frame. These are layout settings; product image IDs, galleries, prices and stock stay unchanged.
Updating the theme or repeating a demo import preserves existing saved page layouts. Change this setting manually on older pages. Product artwork, logo exports and SVG sources are supplied by the separate Demo Importer; the theme keeps only images needed as pattern fallbacks.
Use the Product image panel in the product editor. This image is separate from the gallery and is normally used on product cards.
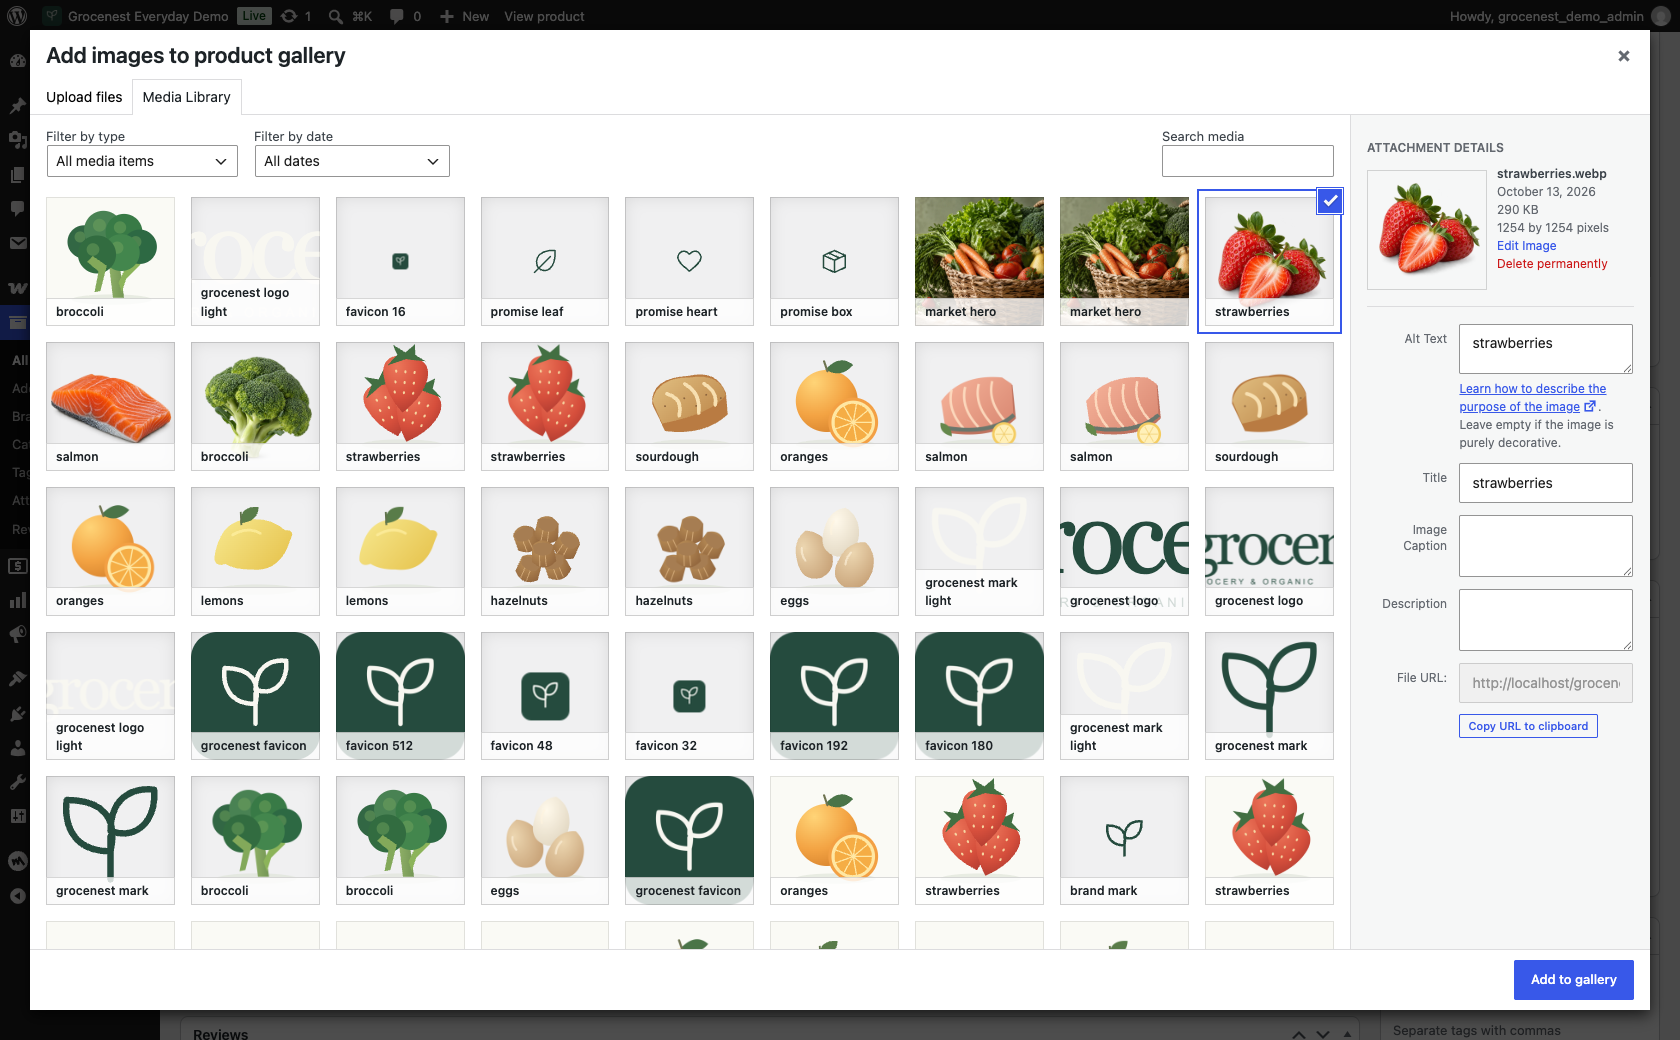
Click Add product gallery images. Select relevant images from Media Library, or use Upload files. Click Add to gallery when your selection is ready.
Drag gallery thumbnails into your preferred order. Remove an unwanted thumbnail from the gallery rather than deleting an attachment that may be used elsewhere.
Save or Update the product. Check the main image, thumbnail order and WooCommerce image zoom/lightbox on desktop and mobile. Use consistent image proportions and clear views of the actual product.
Manage categories and their thumbnails under Products → Categories. Use tags for useful cross-category labels. WooCommerce selects related products from its own catalog relationships and visibility rules; Grocenest styles the native related collection. Edit its layout in the product template and its source data in Products.
Catalog filters depend on actual categories, prices and stock. Changing a card’s text block does not change a product’s price or inventory.
| Page or template | Keep this native feature | Where to configure |
|---|---|---|
| Shop, categories and tags | Product Collection, Product Filters, sorting and pagination | Site Editor for layout; Products for catalog data |
| Product Details | Gallery, prices, variation form, details and related collection | Site Editor for layout; Products → Edit for data |
| Cart | WooCommerce Cart block | Pages → Cart; assigned in WooCommerce settings |
| Checkout | WooCommerce Checkout block | Pages → Checkout; assigned in WooCommerce settings |
| My Account | [woocommerce_my_account] in a Shortcode block | Pages → My Account; Accounts & Privacy settings |
| Order Confirmation | Native order status, summary, totals, downloads and address blocks | Site Editor → Order Confirmation template; order data stays WooCommerce-owned |
Select your published Shop page in WooCommerce’s Products settings. For layout changes, open the Product Catalog template in the Site Editor rather than adding a replacement catalog form to the Shop page body.
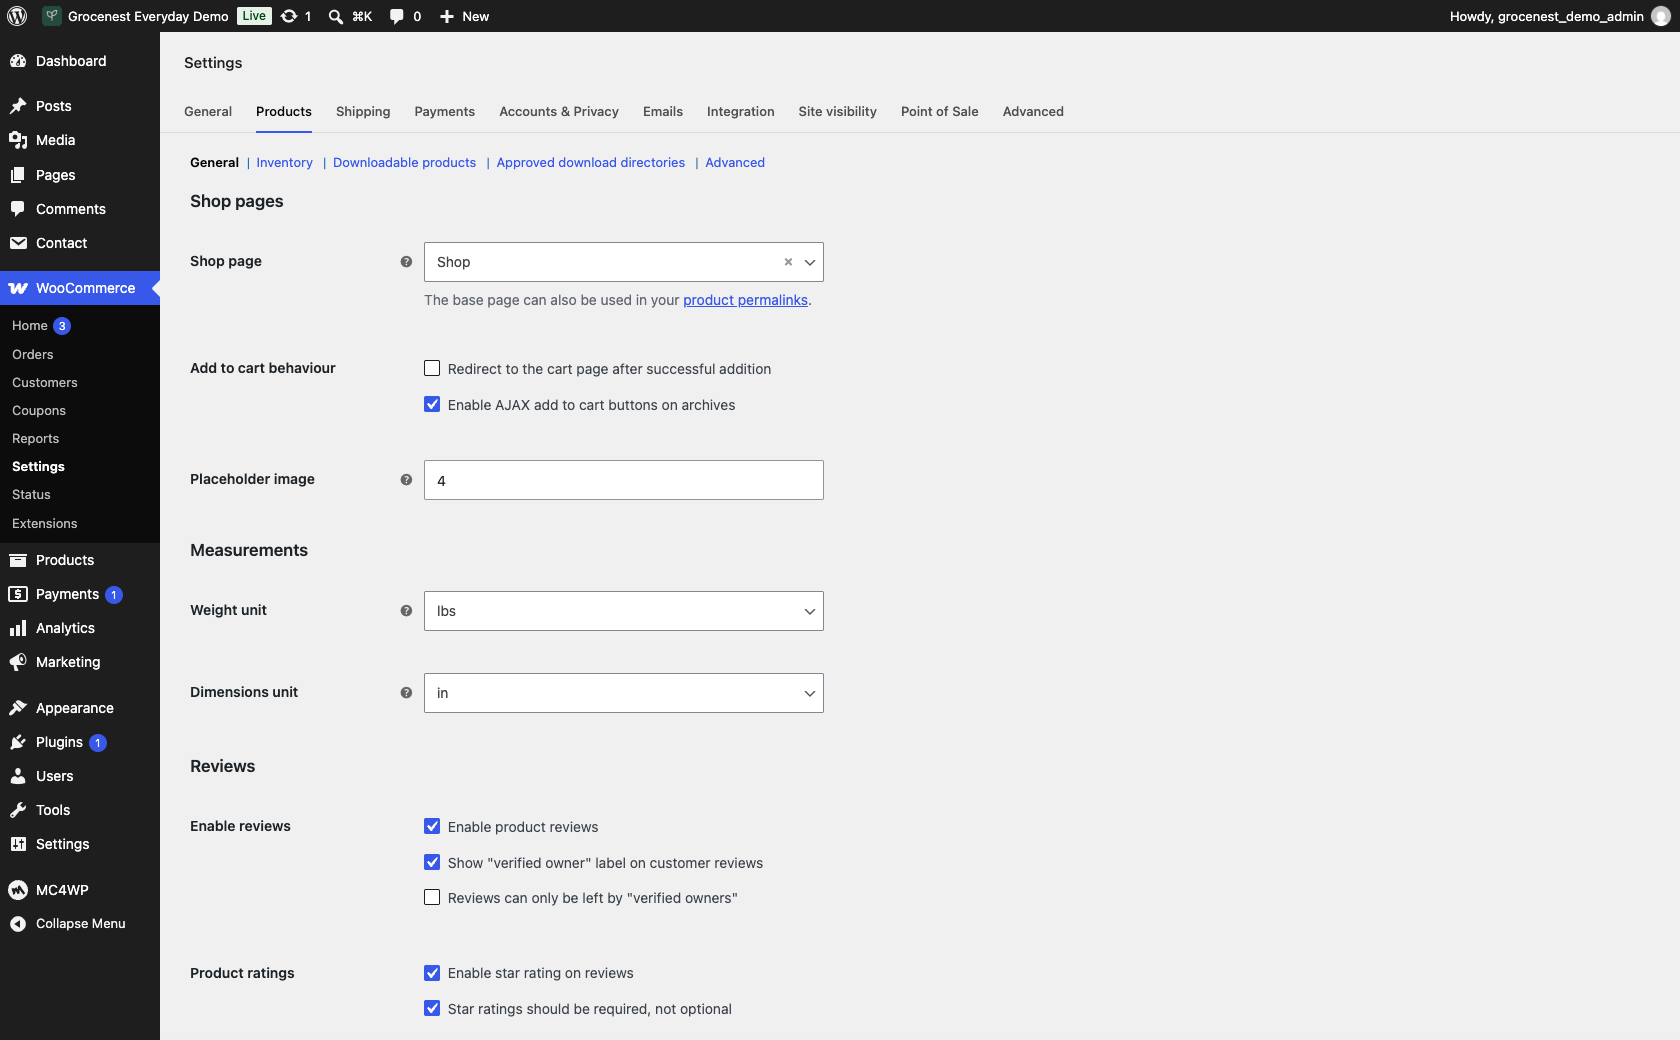
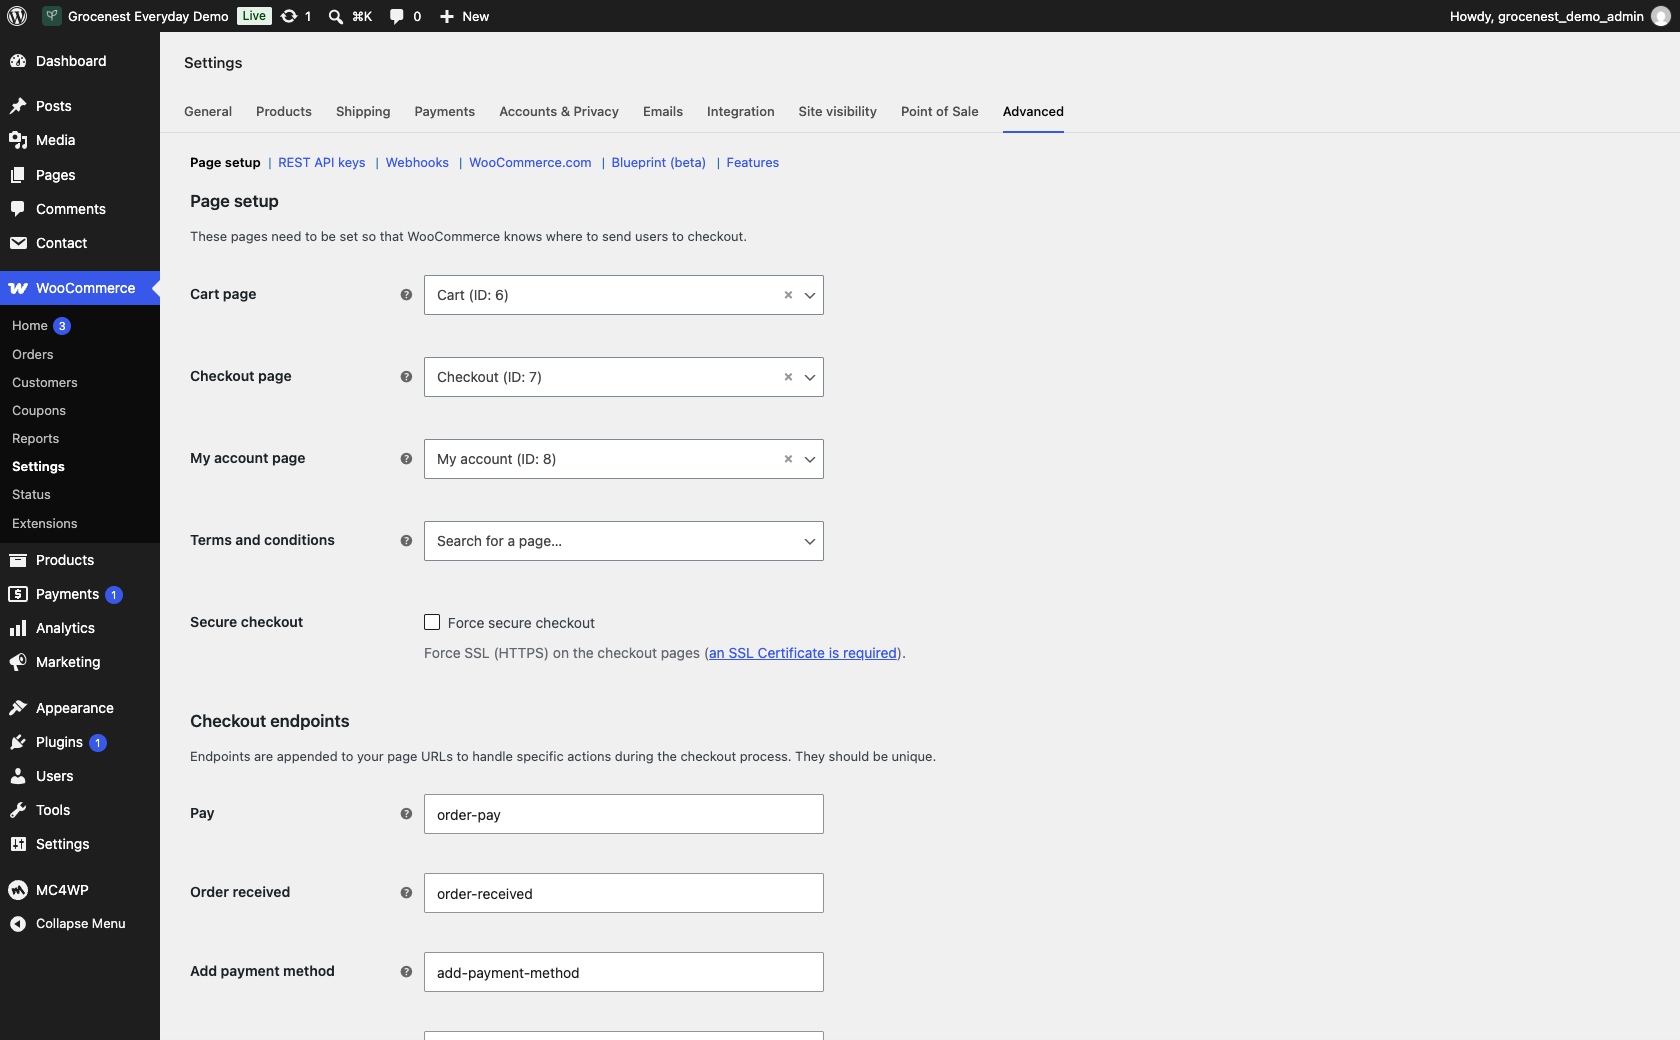
Check WooCommerce → Settings → Advanced → Page setup for Cart, Checkout and My Account. Check Products settings for the Shop page. Each page should have its own appropriate content and assignment; Cart and Checkout must not point to the same page.
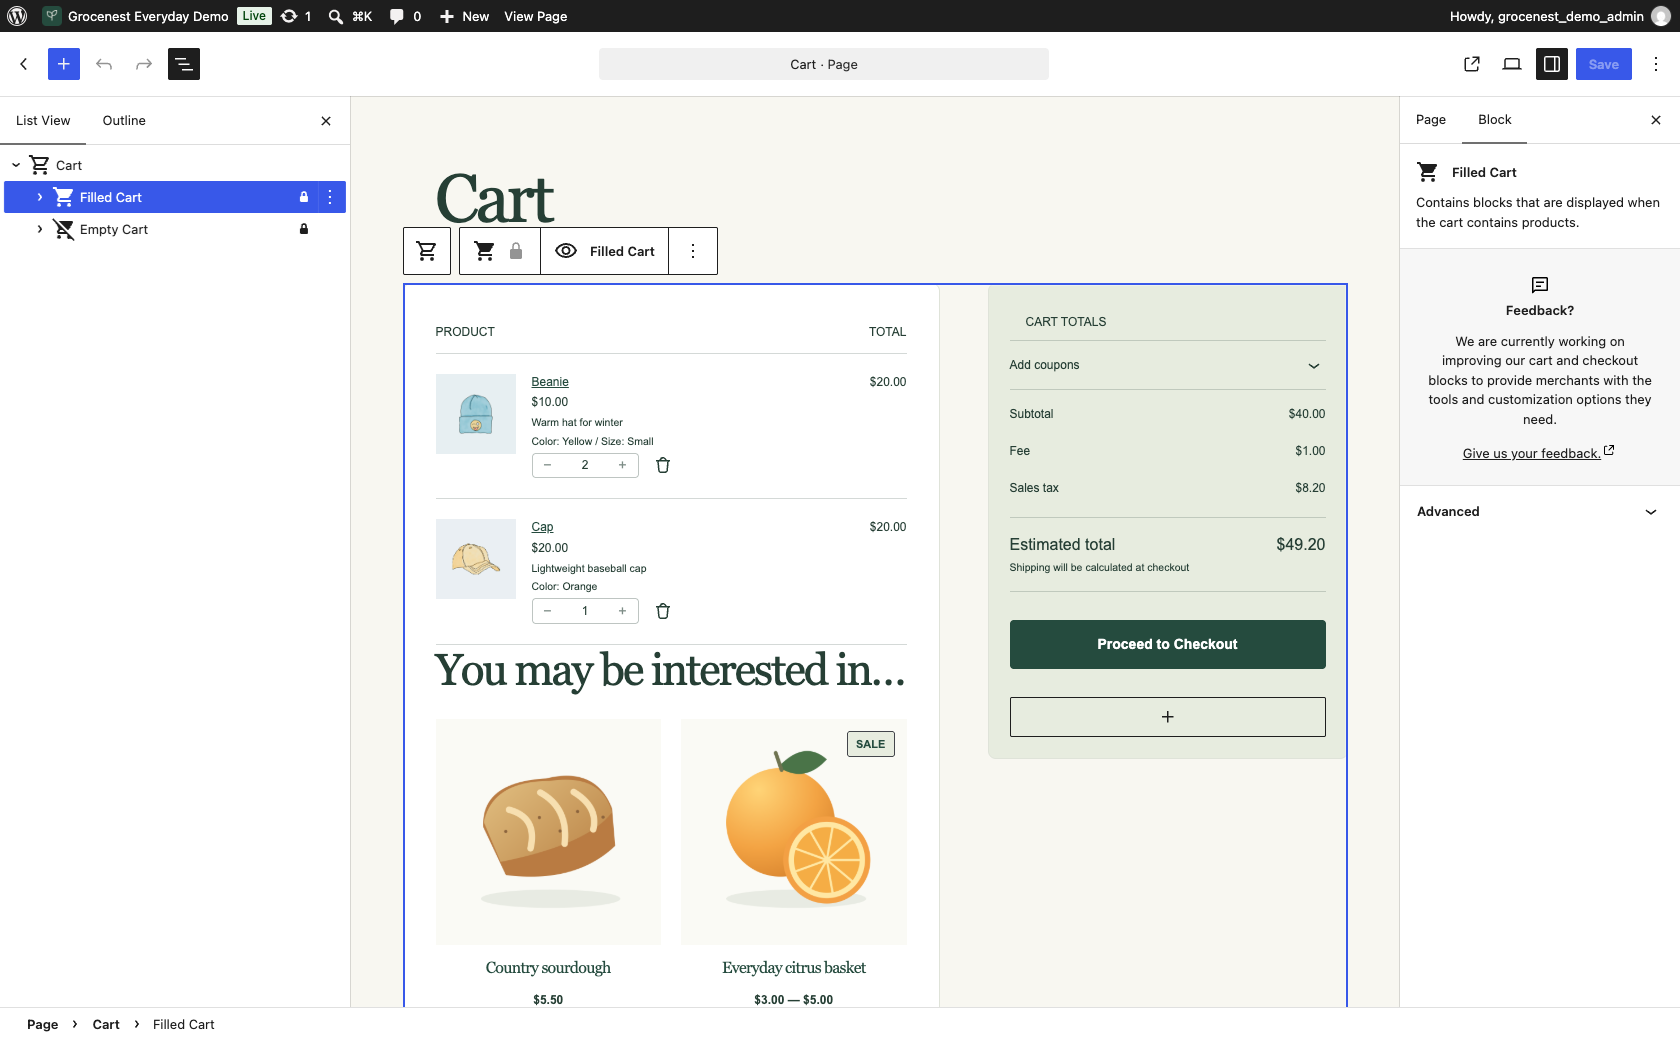
Open it in Pages and keep the native WooCommerce Cart block. Both Filled Cart and Empty Cart are part of its composition.
Choose that page as Cart in WooCommerce’s Advanced settings. Keep Cart and Checkout as different pages.
Add your own test product on staging, change its quantity and remove it to check the filled and empty states.
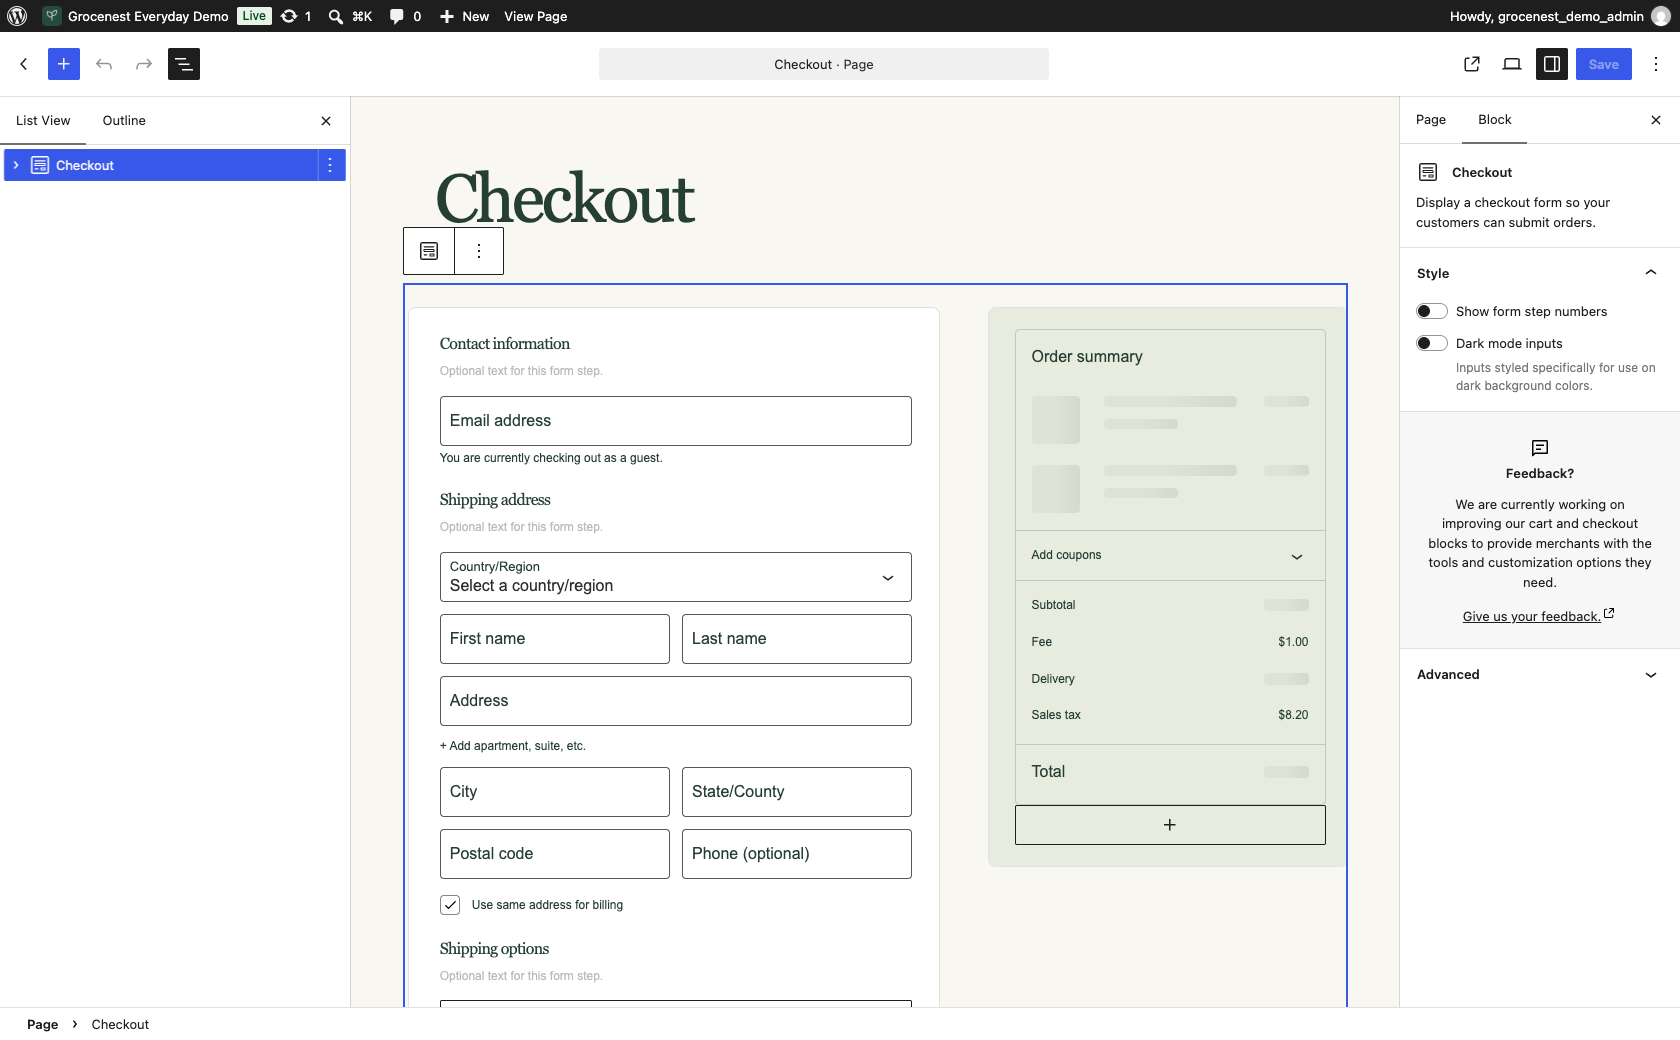
Open Pages → Checkout. Preserve its contact, address, shipping, payment, order summary and action blocks.
Assign Checkout in Advanced settings. Configure shipping, taxes and a payment gateway separately in WooCommerce.
Use your staging store to check validation, totals and order confirmation. An editor preview does not verify a purchase flow.
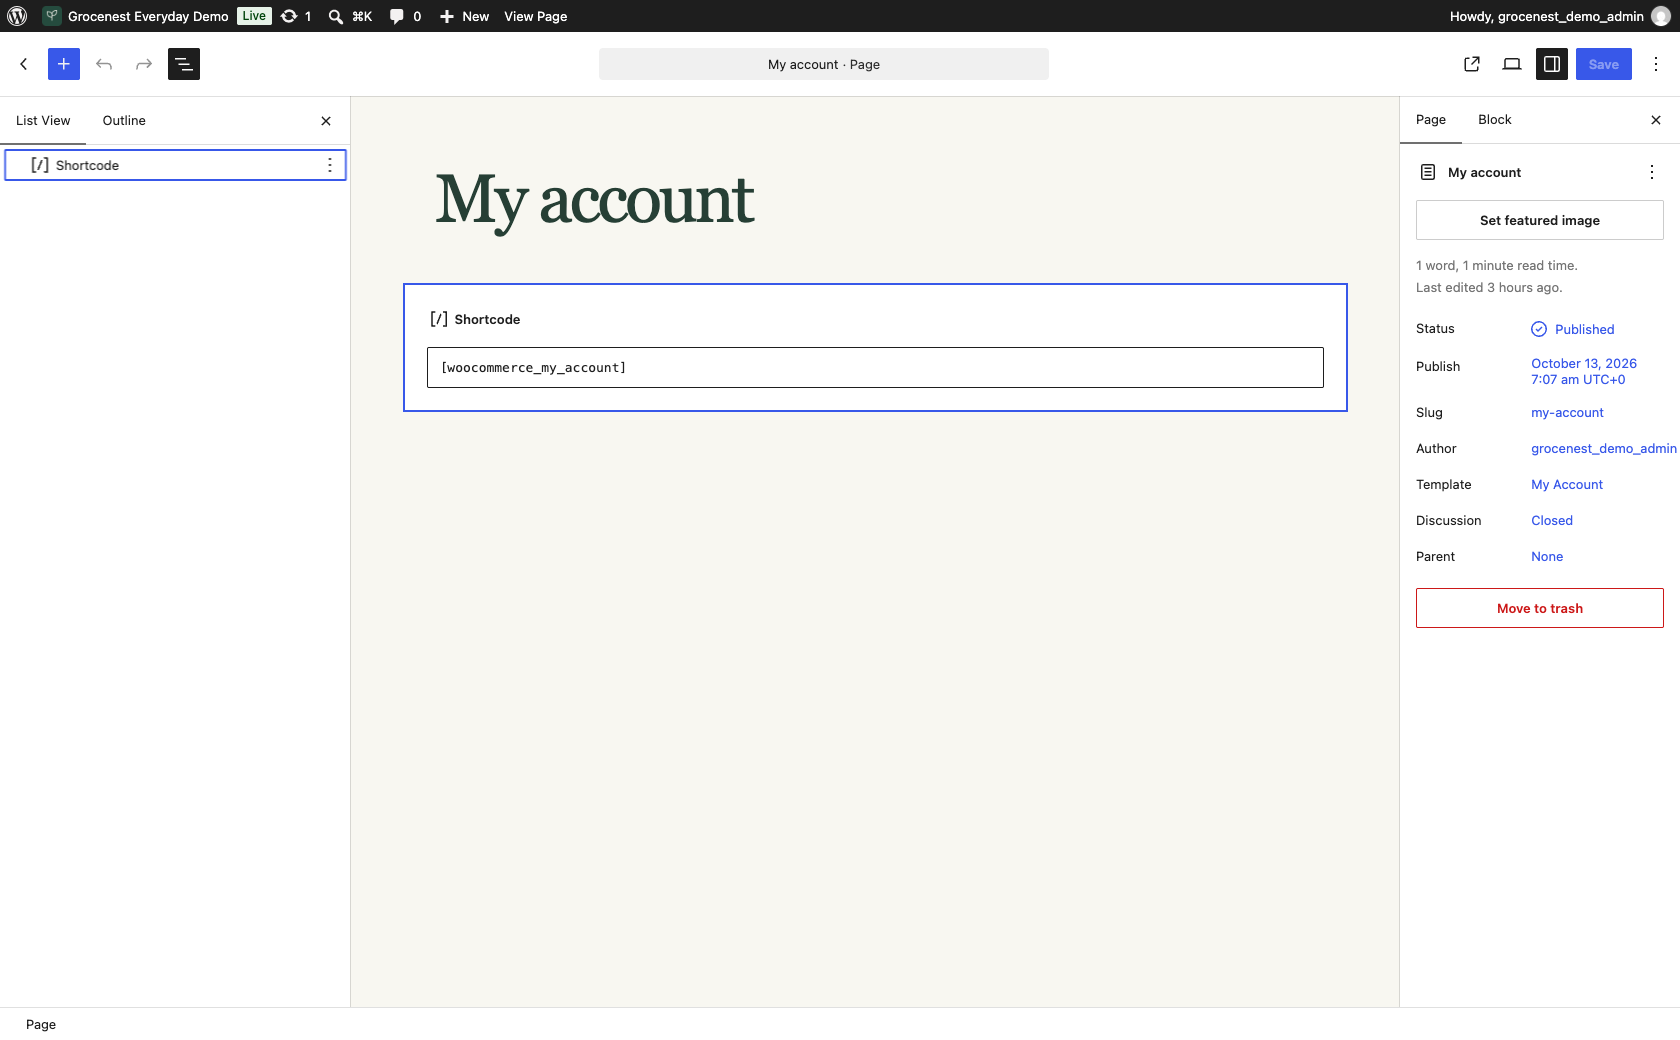
The page should contain one Shortcode block with [woocommerce_my_account]. Grocenest provides the surrounding editable template.
Select it as My account in WooCommerce → Settings → Advanced → Page setup.
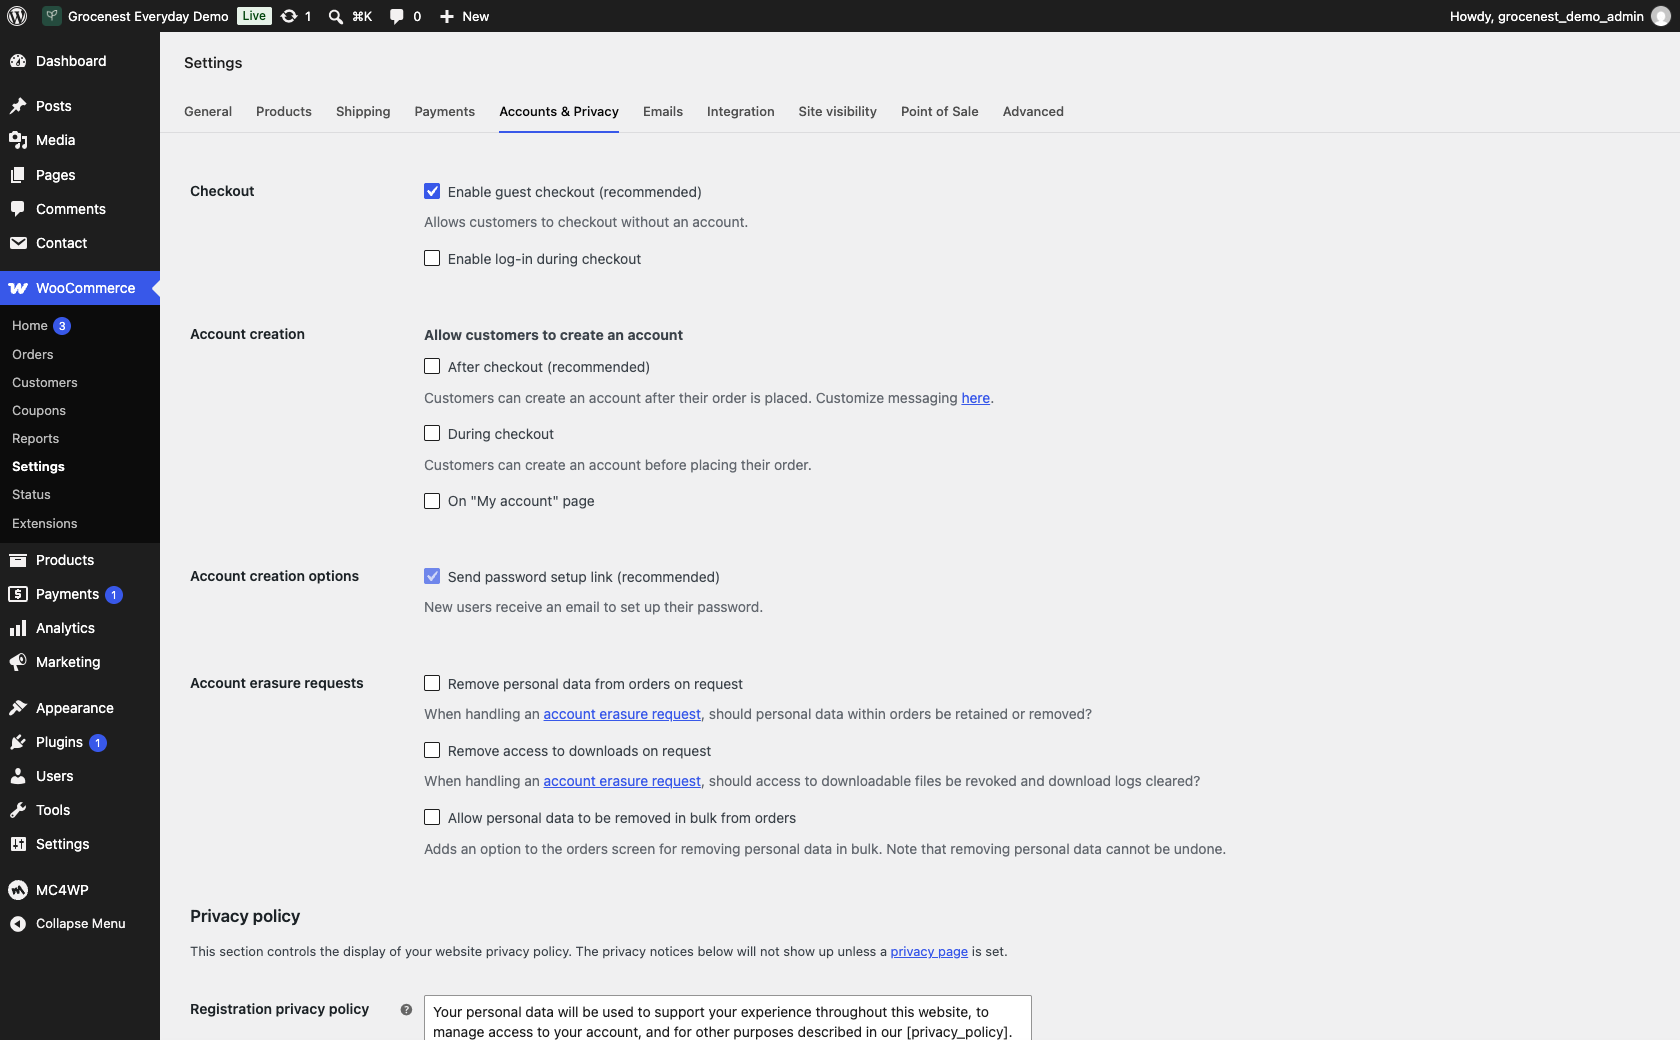
Use Accounts & Privacy to enable account creation on My Account when you want a Register form. Check guest and signed-in views using your own test account.
Edit banners, introductions, support links, spacing and shared parts in the Site Editor. Keep the native commerce blocks and Post Content connection. Checkout field rules, shipping, taxes, payment methods, account endpoints and order permissions belong to WooCommerce and its extensions.
Use a staging store and a payment gateway’s test mode. Add a simple product and a variation, change cart quantities, remove an item, try a coupon, check shipping/taxes, place a test order and inspect confirmation and account orders. Test guest and signed-in flows. Never use a real customer’s account for testing.
More: WooCommerce Advanced settings and Accounts & Privacy settings.
Contact Form 7
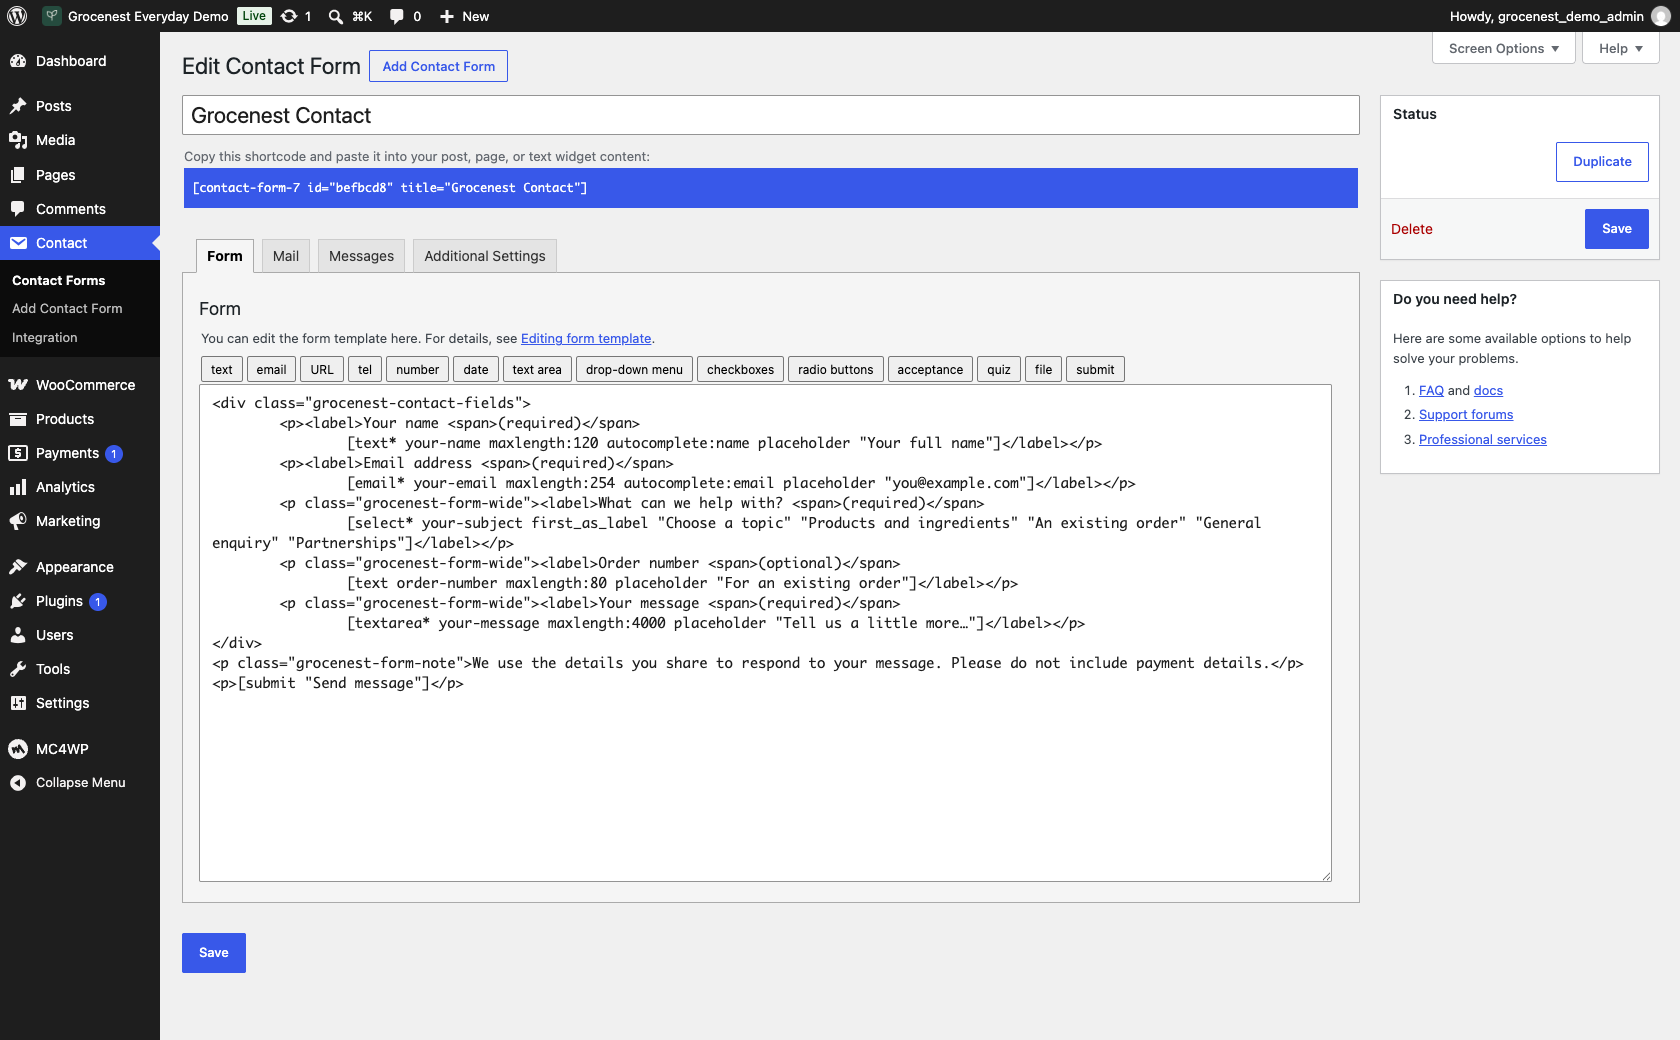
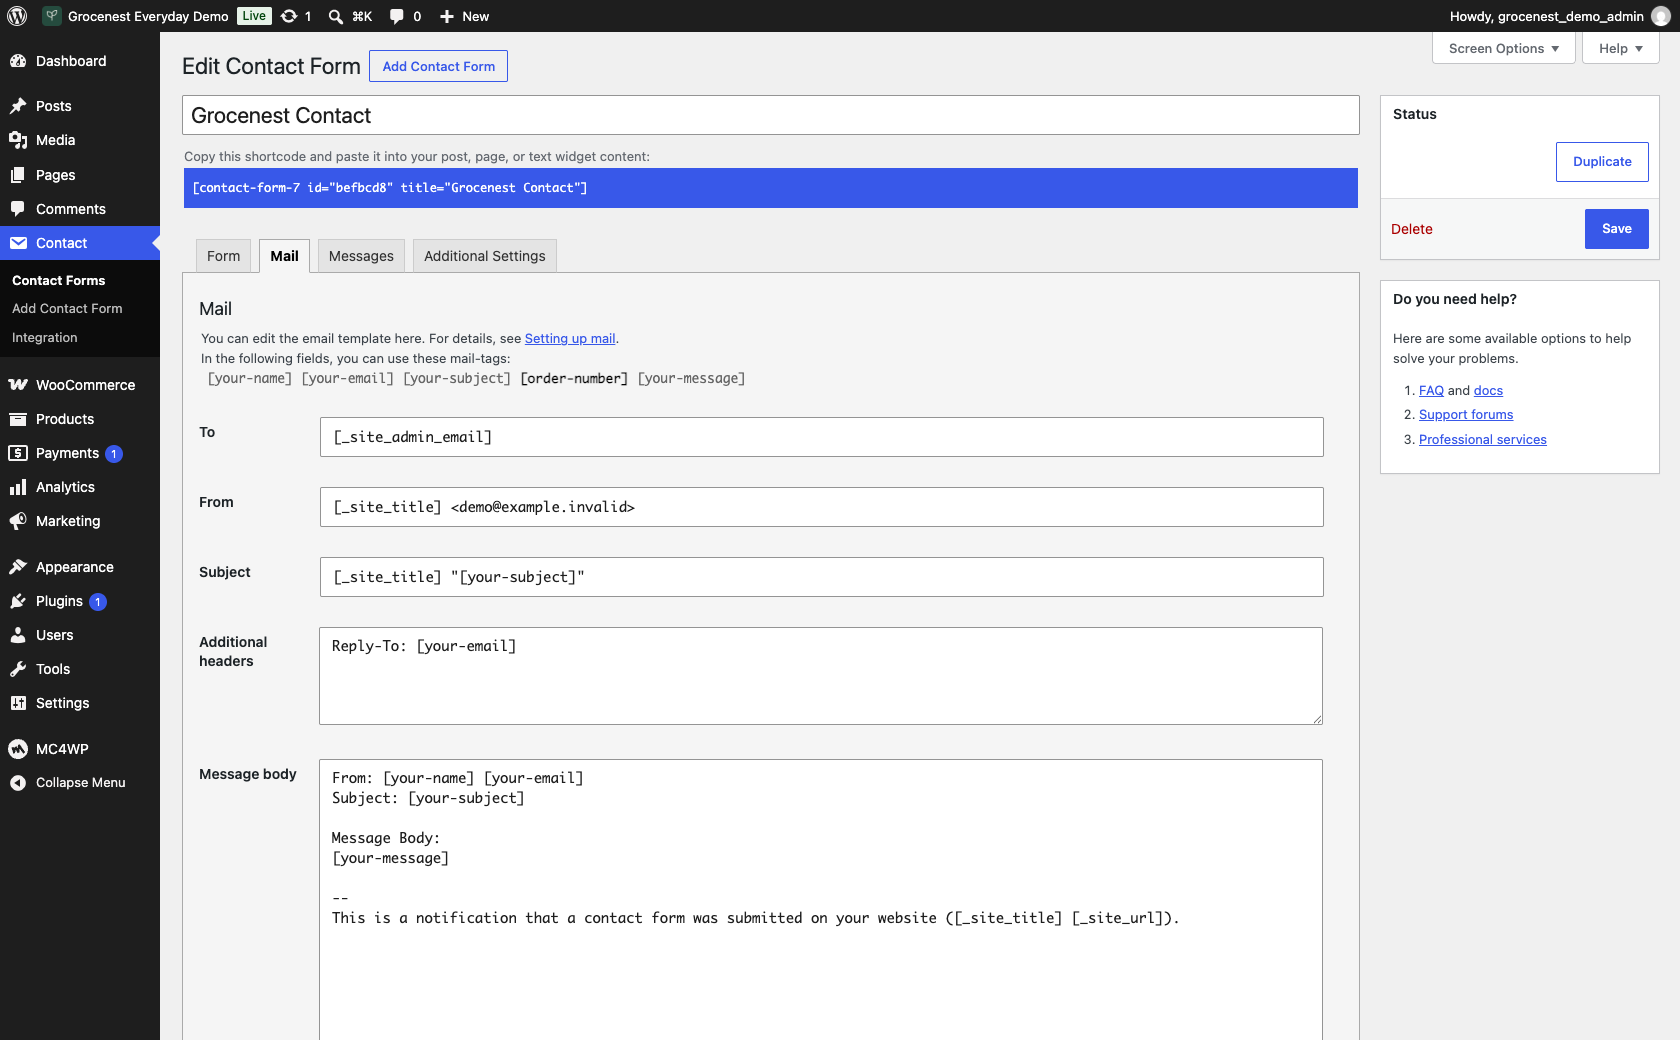
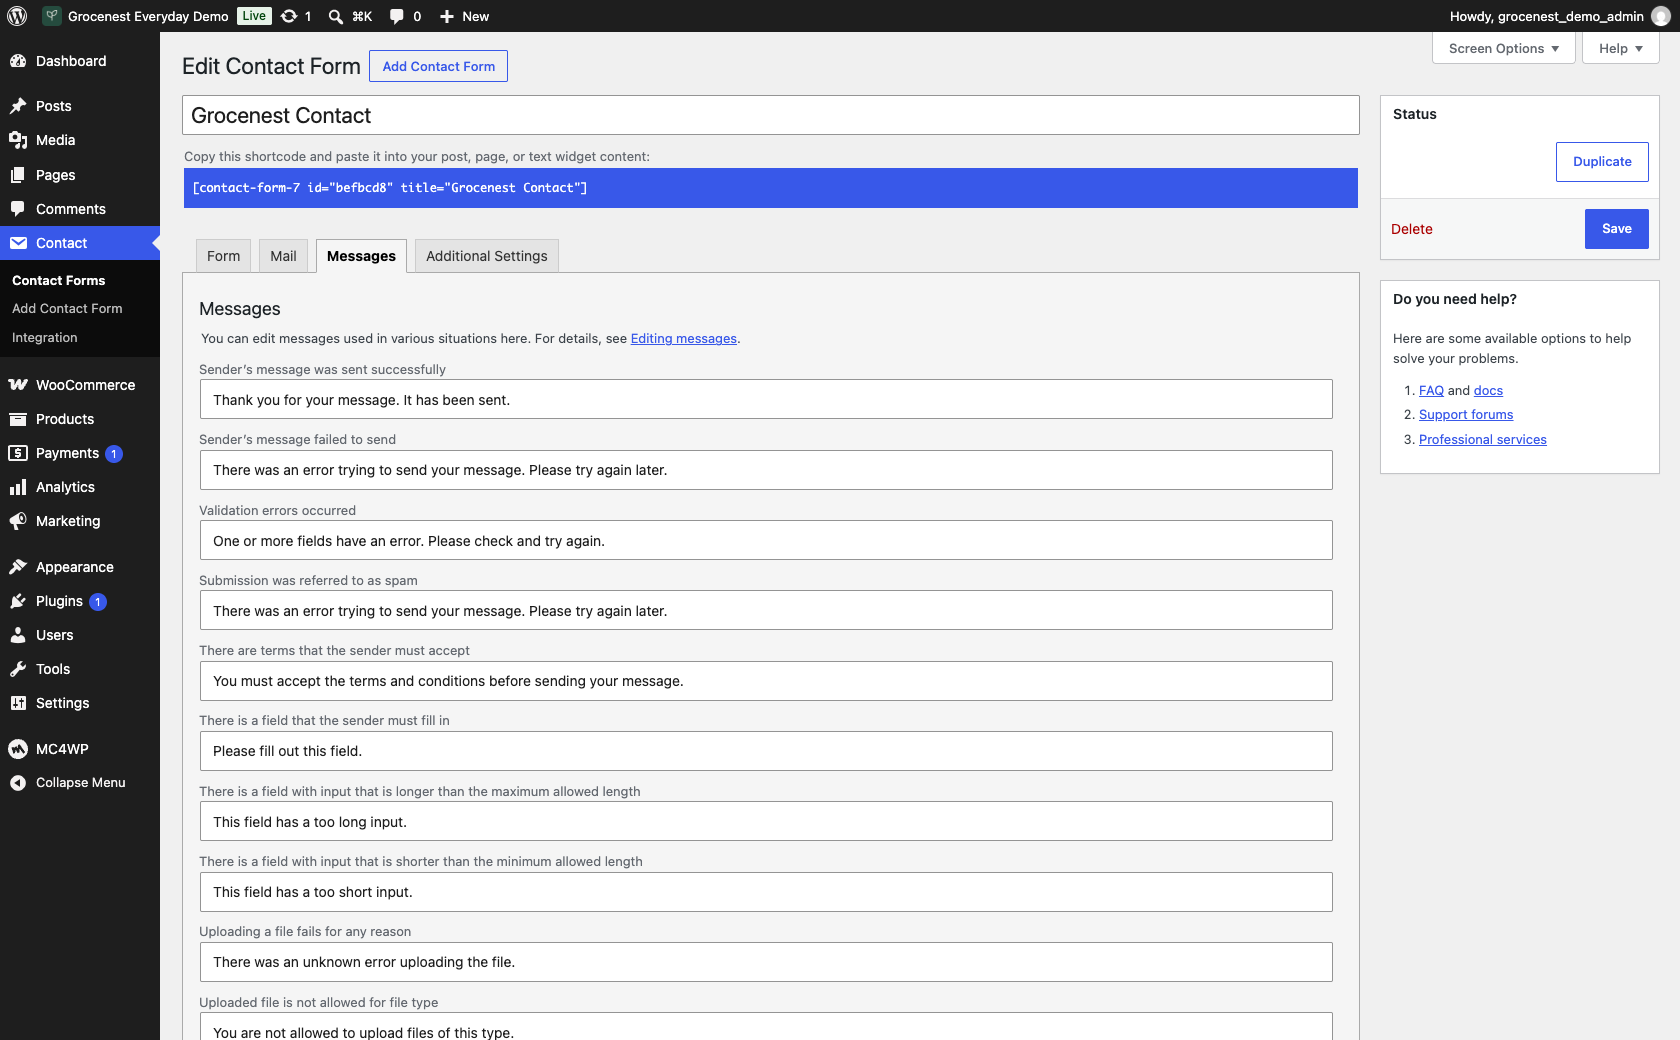
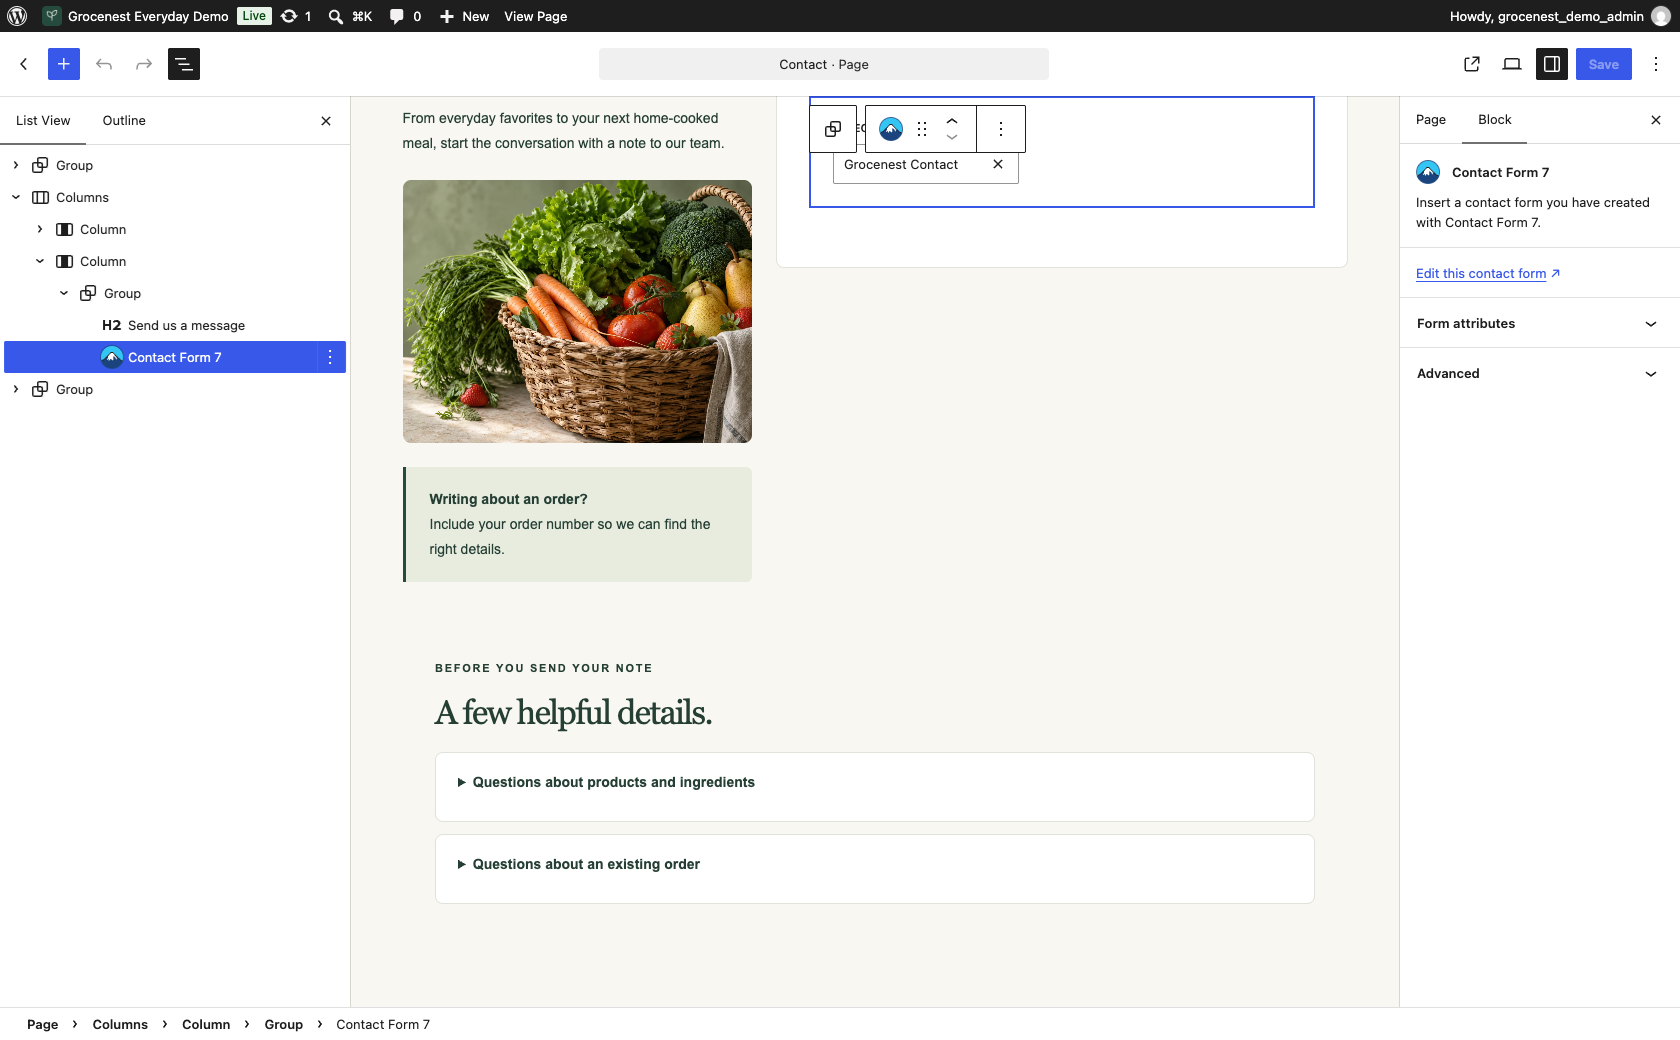
The page layout is edited in Gutenberg. Fields, validation messages and email settings are edited in Contact Form 7.
Mailchimp for WordPress
The shared section is edited in the Site Editor. Form fields, Audience selection and signup messages are edited in MC4WP.
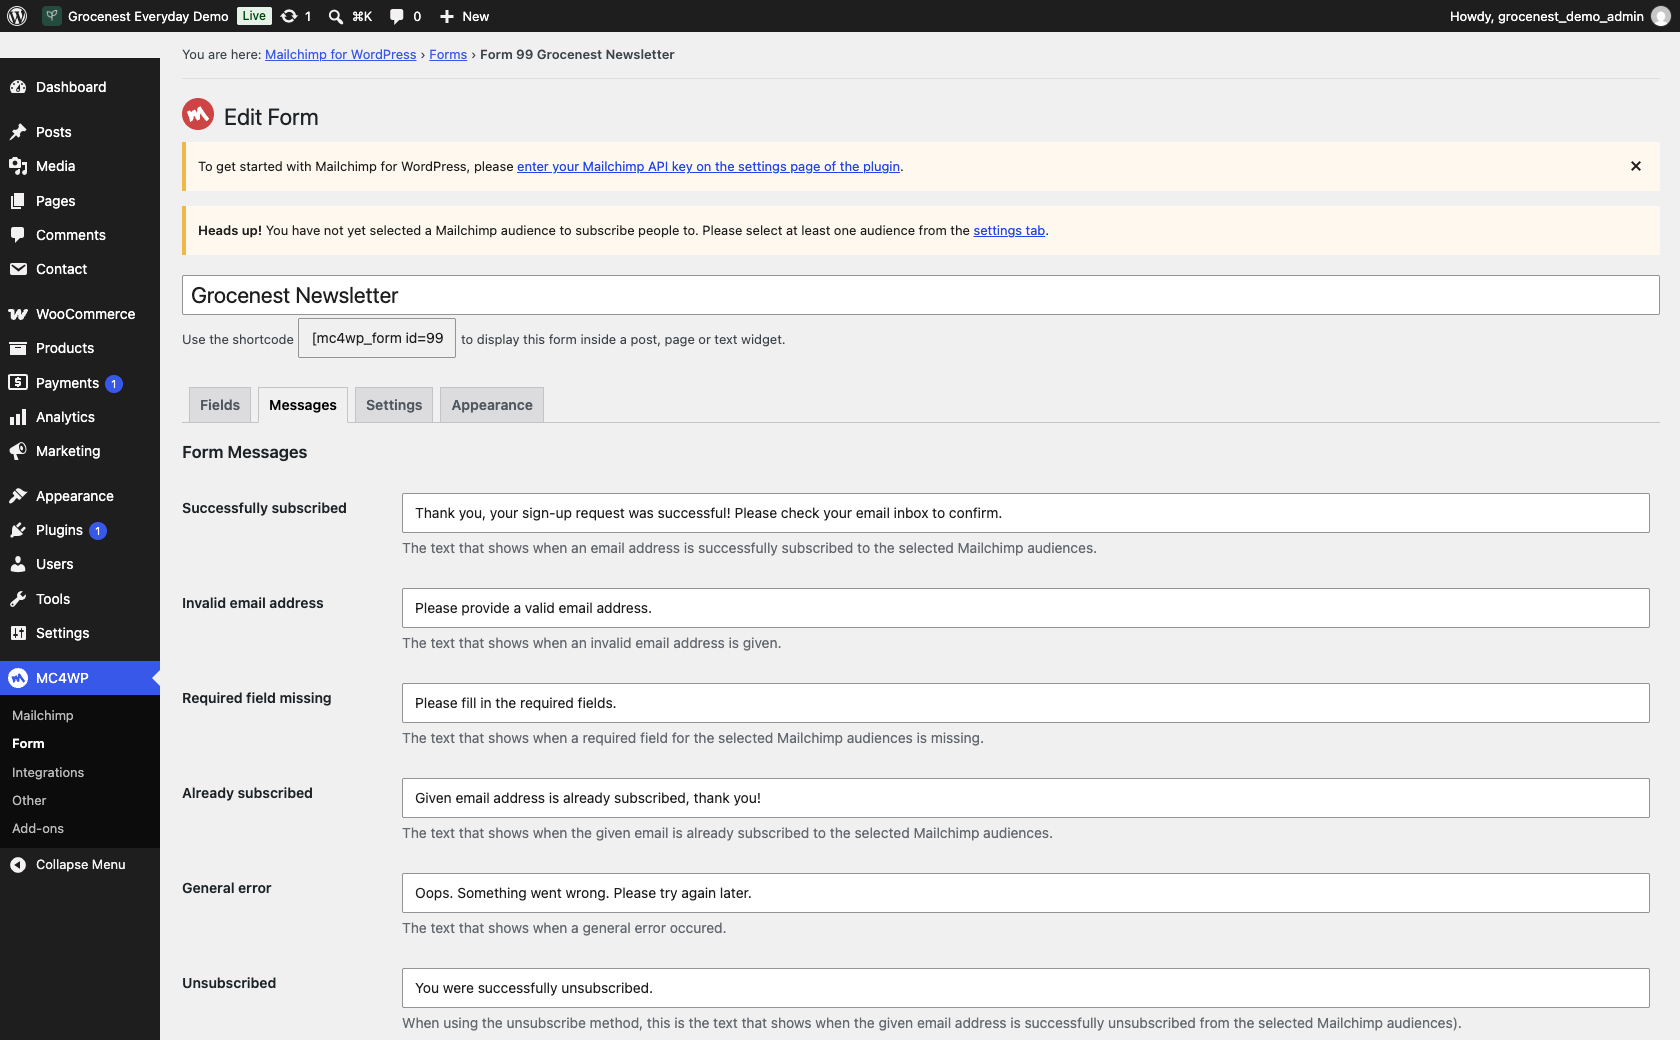
Edit the imported Grocenest form or create your own. Adjust labels, required fields and English success/error messages.
Set your real recipient and a sender address appropriate for your domain. Use the visitor email in Reply-To rather than as the sender. Set up your host’s email delivery or a suitable mail transport service.
Edit the native Contact Form 7 block in Gutenberg and select the correct form.
Check empty and invalid fields, then send a test with your own address. Confirm that the email reaches the intended inbox.
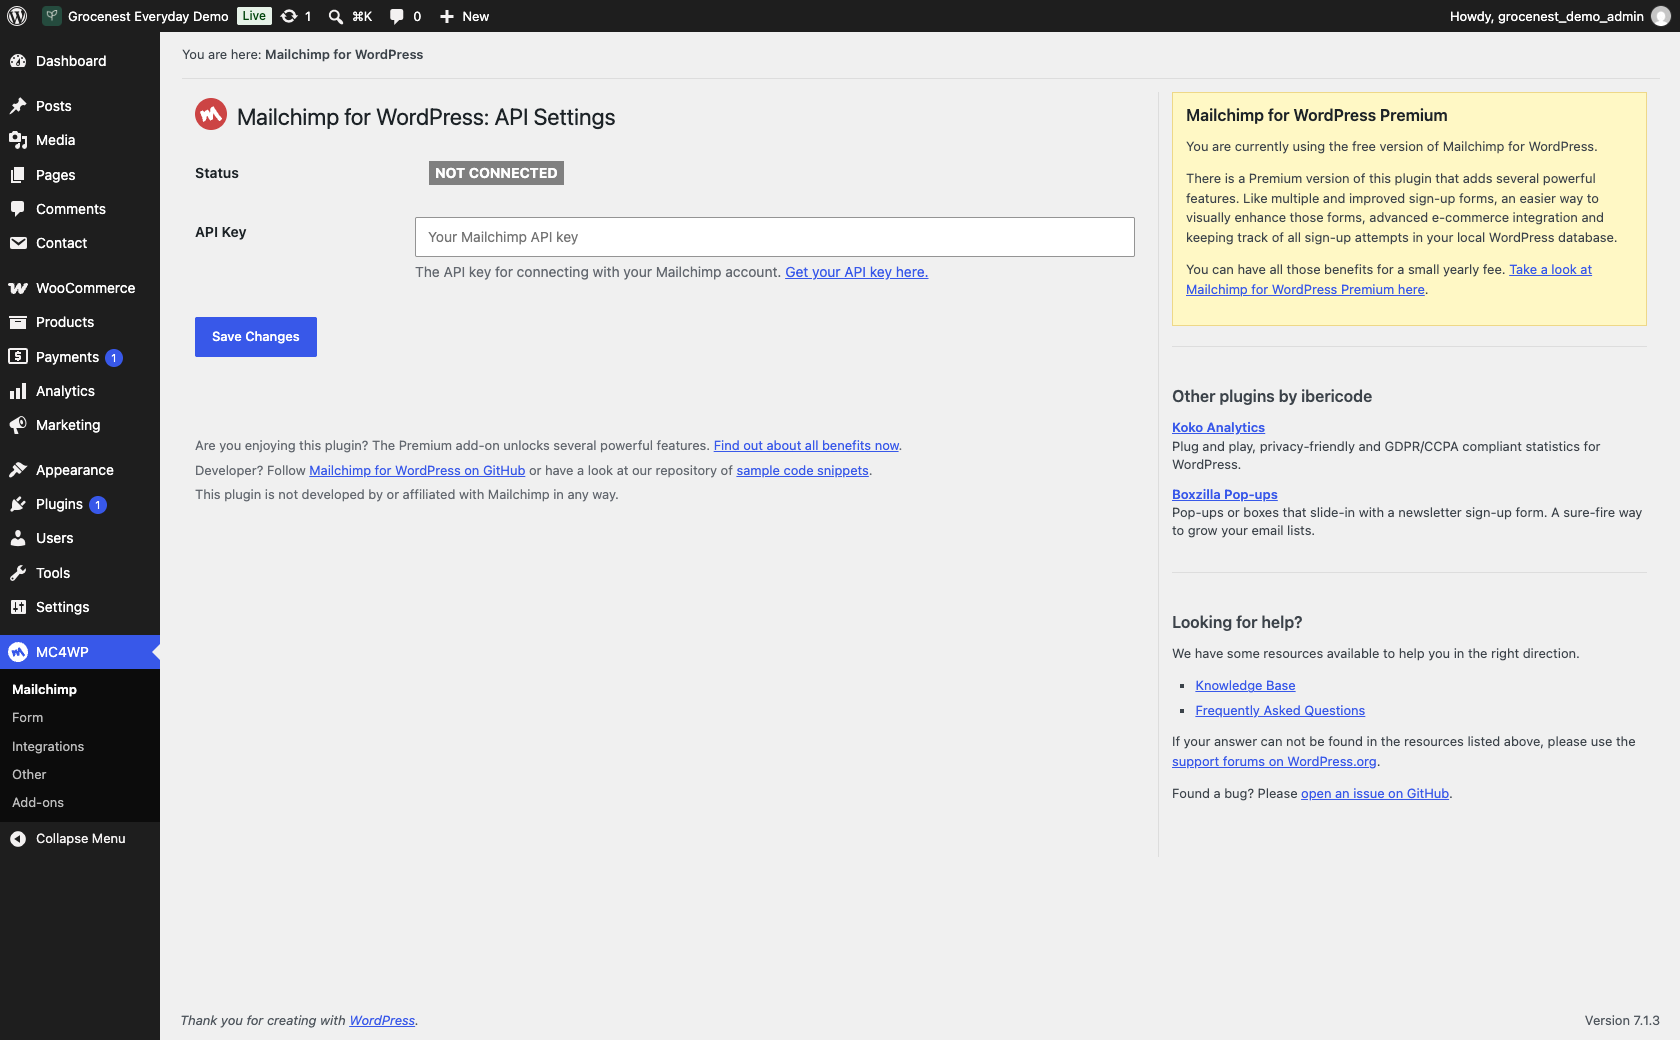
Enter your API key in WordPress. Credentials are not included in any demo.
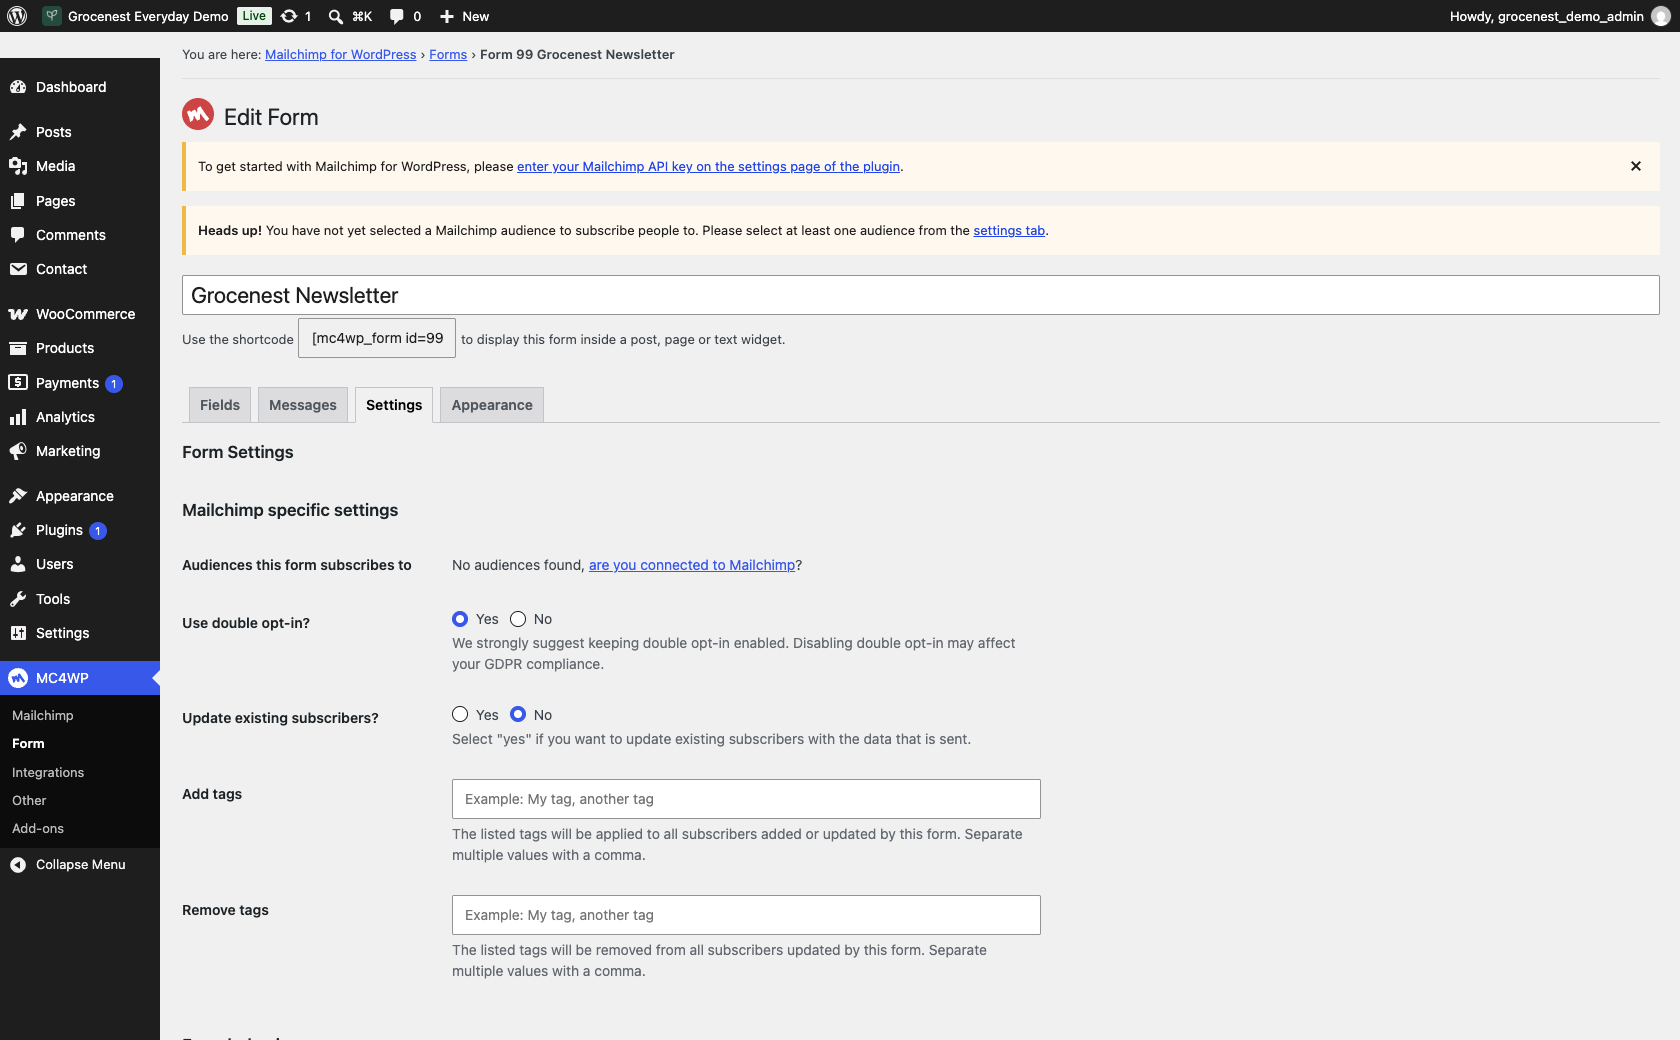
In MC4WP → Form, select the intended Audience in its settings. Check required Audience fields and choose the appropriate double opt-in setting.
In Appearance → Editor → Patterns → Template parts → Newsletter, select the native MC4WP form block and choose the form. If you saved a pending message earlier, replace that group with the form block.
Submit the form, check its success/error messages and confirm the subscriber status in Mailchimp. If double opt-in is enabled, open the confirmation email and confirm the subscription.
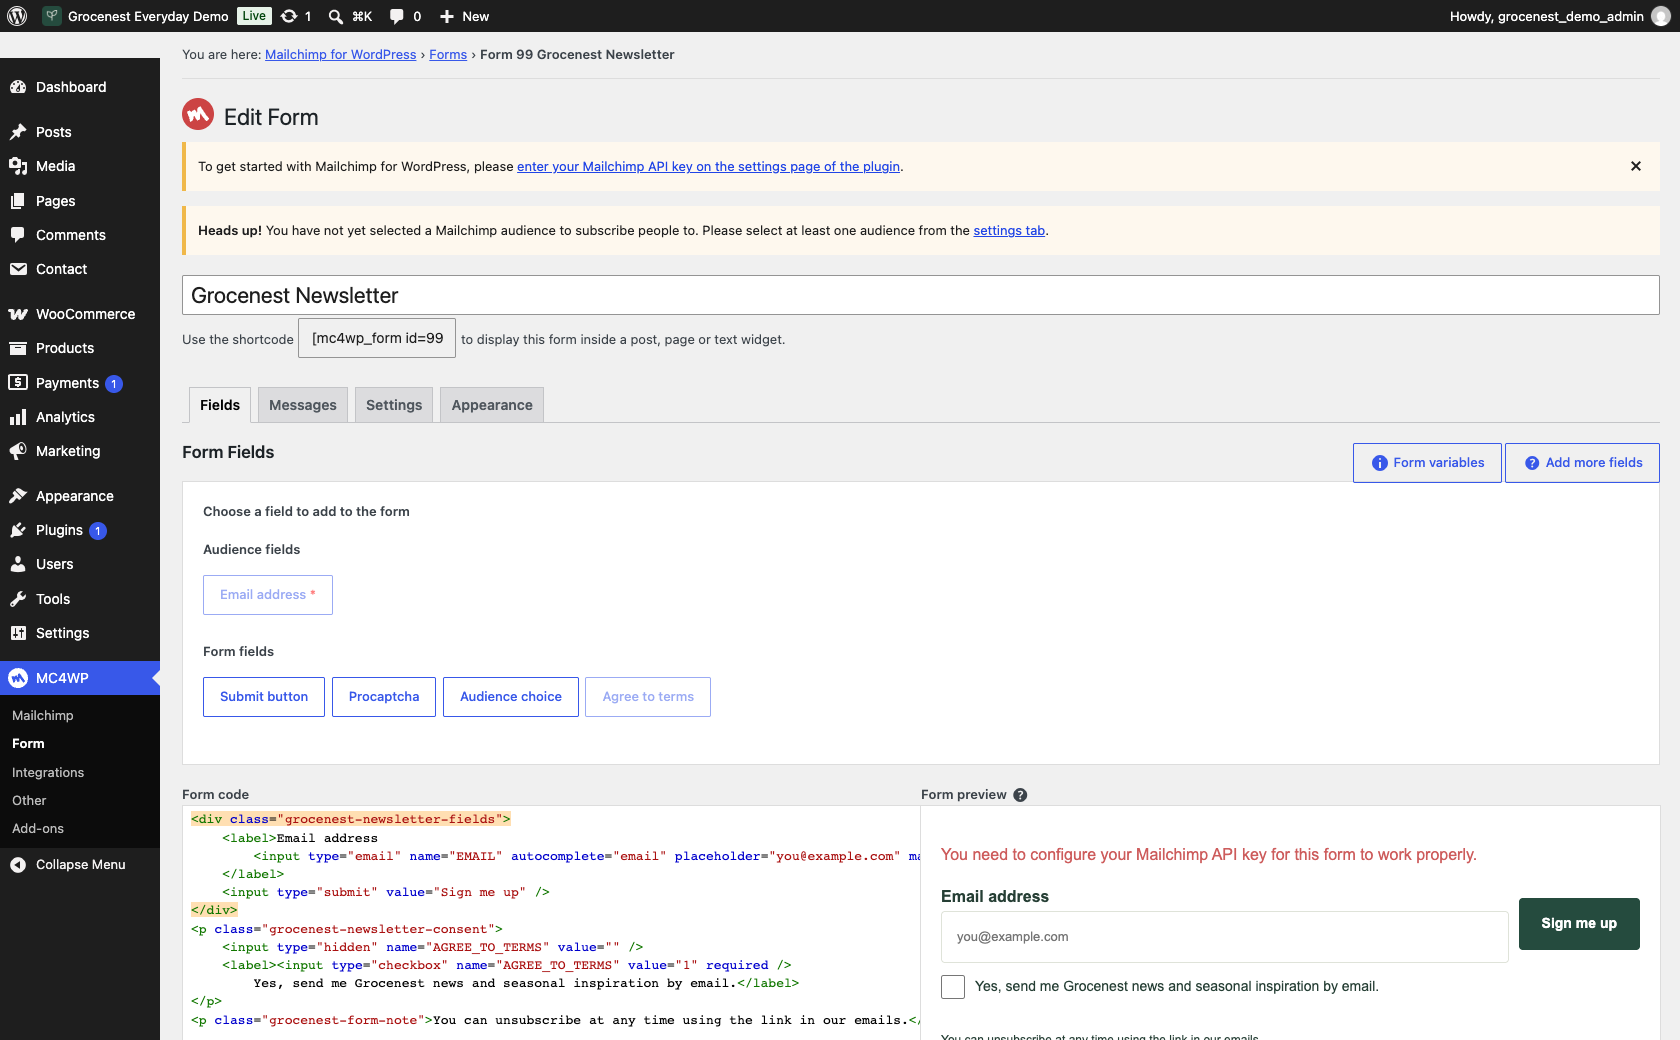
Until both API connection and Audience selection are ready, the initial newsletter composition can show a pending or disabled state. Installing a form plugin after importing does not replace an edited Contact or Newsletter layout automatically; insert its native form block yourself.
Back up the database, uploads and your custom theme code. Test the new theme ZIP on staging, then update through WordPress’s theme upload flow. Saved Site Editor customizations normally retain precedence, so a changed theme default may not replace your customized template.
For colors, fonts and common spacing, use Styles and block settings before writing CSS. For a small CSS adjustment, use the Site Editor’s Additional CSS option if available in your WordPress version. Preview changes carefully on both desktop and mobile.
Select a Group block and add store-reading-width under Advanced → Additional CSS class(es). Then add this CSS through your supported customization surface:
/* A merchant class for narrow editorial content. */
.store-reading-width {
    max-width: 48rem;
    margin-inline: auto;
    padding-inline: 1.25rem;
}
Use a child theme for PHP changes or longer-term code customization. Avoid editing parent theme files directly: an update can replace those edits. Theme CSS uses semantic colors and typography tokens from theme.json; developer changes should reuse them.
WordPress can export Site Editor customizations. Keep this alongside a full site backup; a theme export is not a backup of orders, products or Media Library files.
Upload the installable Grocenest theme ZIP, not a documentation archive, plugin ZIP or outer download bundle. The theme archive must contain a grocenest folder with style.css and the theme files.
Reopen Appearance → Grocenest Demo Import and resume the saved job. If it reports a reserved SKU collision, identify the existing product before making changes. If a bundled image is damaged, reinstall the original importer bundle. Keep the exact error for support. Do not repeatedly start new imports or delete store products to guess at a fix.
Existing homepage assignments are preserved by default. Use Settings → Reading to choose the imported page, or use the importer’s explicit homepage replacement choice. View imported demo opens the selected demo even when it is not the site homepage.
Check for saved template or template-part customizations in the Site Editor. These can override current theme defaults. Back up them before deciding whether to reset. Also clear relevant cache layers.
Select it and check for a block-level override. Reset that individual setting to inherit Global Styles. Image pixels and logos do not change when the palette changes.
Check that products are published and visible in the catalog, their categories and stock are correct, and active filters are not excluding them. Retain the native product query on Search and Product Collection blocks. Clear filters and try a known product title.
Enable account registration on My Account under WooCommerce → Settings → Accounts & Privacy. Confirm that the My Account page is assigned and contains the native shortcode.
Confirm the Mailchimp API connection and the selected form’s Audience. A saved Newsletter part may still contain its original pending group; replace it with the native MC4WP form block and select your configured form.
A successful form response does not confirm inbox delivery. Check recipient, sender, spam folder and your hosting/mail transport configuration. Test again with an address you own.
Check Media Library and the attachment files in uploads. Replace missing images through their native block or product image fields. Use consistent image proportions and clear cache after a replacement. Avoid deleting attachments that are still in use.
Check WooCommerce’s page assignments and the native blocks/shortcode on each page. Confirm published pages and valid endpoints. If routing rules need refreshing, save Settings → Permalinks without changing the structure unintentionally.
This is a store-owner setup checklist. It does not certify WooCommerce Marketplace acceptance. Marketplace review and the theme’s release checks are separate processes.
For theme assistance, visit AtelierThemes. Include your theme version, WordPress/WooCommerce versions, affected URL, screenshot and steps to reproduce. For import issues, include the selected demo and the exact error. Keep passwords, API keys and customer information out of support messages.
This documentation opens locally: keep index.html and styles.css together and open index.html in a browser. It has no JavaScript, external fonts or tracking. External help links require an internet connection. Use your browser’s Print command for a print-friendly copy.
Prepared for Grocenest 1.0.0-rc.93 and Grocenest Demo Importer 1.0.0-beta.2 · 13 October 2026 · English documentation by AtelierThemes.
Back to the top ↑